Cleaning Silver with Aluminum Foil: A Complete Guide
Cleaning silver with aluminum foil uses baking soda and hot water to lift tarnish; get the quick setup, safe-item checks, and aftercare for a bright finish.

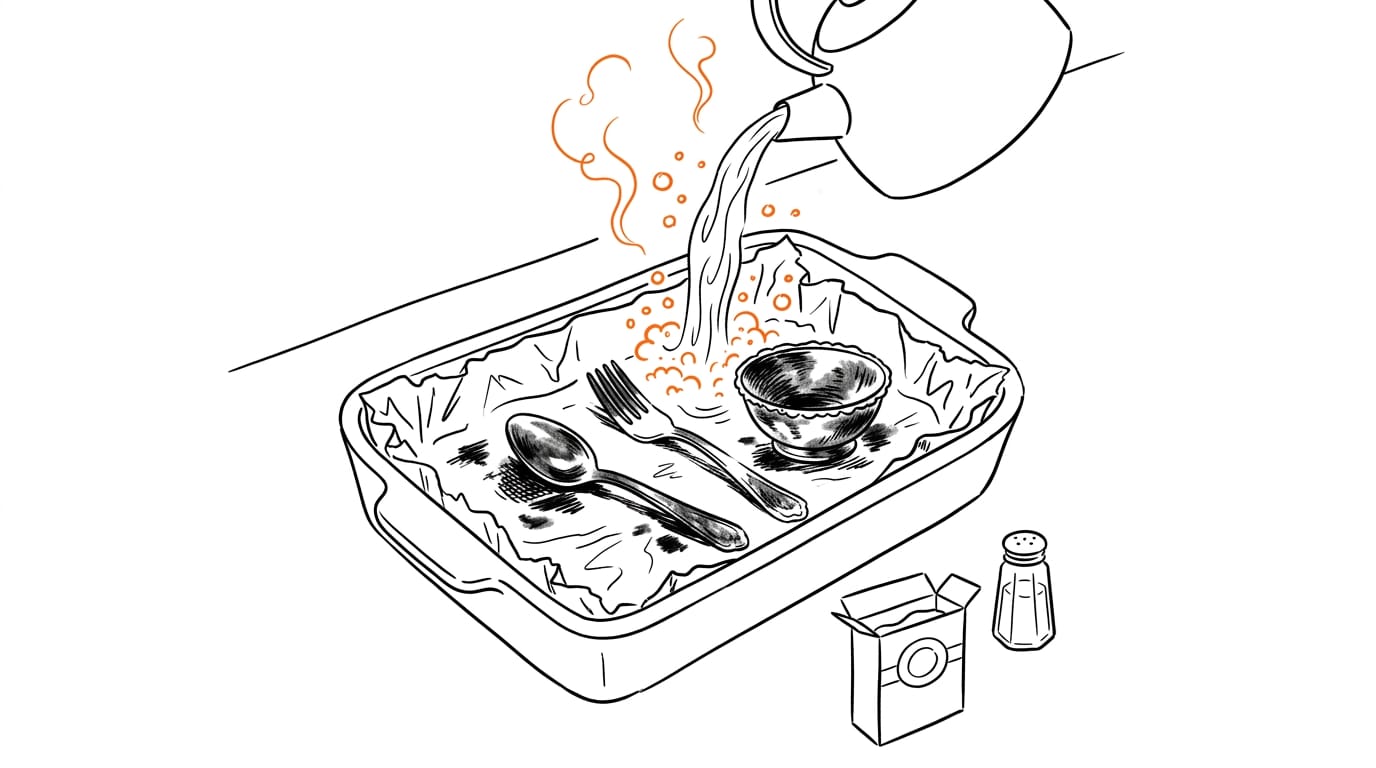
Cleaning silver with aluminum foil is a hot-water soak that removes tarnish by transferring it from silver to aluminum, rather than scrubbing the dark film away. Line a heatproof dish with foil, add salt or baking soda, and make sure each fully submerged piece touches the foil; rinse and dry it well afterward. The method suits many everyday silver items, but use caution with plated heirlooms, antiques, and gemstone jewelry, since heat or treatment can damage delicate finishes.
Picture pulling the silver gravy boat out for Sunday lunch and finding it’s gone dark and dull. You don’t need a special polish to bring back the shine.
Your kitchen already holds what you need: a sheet of aluminum foil, a little baking soda, and hot water.
That dark film is tarnish, a thin layer that forms when silver reacts with sulfur in the air. Foil cleaning reverses that reaction, pulling the tarnish off the silver and onto the foil.
In this post, we’ll cover the chemistry, exact steps, safe and unsafe items, and aftercare.
How Cleaning Silver with Aluminum Foil Works
The foil method reverses the dull layer on silver rather than scrubbing it off. Here’s what happens in the bowl.
What makes silver tarnish over time
Tarnish is the dark film that builds up on silver. Sulfur compounds in the air react with the metal’s surface to form a thin silver sulfide film.
Exposure over time lets that film grow, so a piece left in a cupboard for a year can look flat and dark when you bring it out.
Consider a host who only brings out the silver gravy boat at Christmas. It’s dull by the time dinner starts, but the silver underneath is fine, and there’s time to fix it before the guests arrive.
How the foil reaction reverses tarnish
The method uses an electrochemical reaction, a chemical change driven by electrons moving between two metals.
When silver touches aluminum foil in hot salt water, sulfur moves from the tarnish to the aluminum, and the byproduct is a gas called hydrogen sulfide.
The main reaction looks like this:
3Ag2S + 2Al + 6H2O → 6Ag + 2Al(OH)3 + 3H2S
Ag is silver, Al is aluminum, H2O is water, and H2S is hydrogen sulfide.
This is about reversing tarnish, not stripping it. The silver stays put, and only the sulfur moves.
Why salt and baking soda matter
Each ingredient has a specific job:
- Electrolytes. Salt and baking soda dissolve in the water and act as electrolytes, which means they carry electric charge and keep the reaction going.
- Oxide removal. Foil carries a thin oxide film on its surface, and salt and baking soda help clear it so the aluminum can react.
- Salt dissolves better in hot water. Heat lets more salt dissolve, giving the solution more electrolyte to work with.
Why skip harsh polish for this method
Here’s why this method leaves harsh polish on the shelf:
- No harsh chemicals. Everything comes from the cupboard: foil, salt, baking soda, and hot water.
- No scrubbing or abrasion. The reaction does the work, so you aren’t rubbing the metal.
- Reaches small crevices. The solution gets into the grooves of a fancy handle or the curls of a filigree pattern, where a cloth can’t reach.
- Eco-conscious option. Skipping harsh products makes this a greener choice for your home.
No special product required.
Gathering Supplies and Setting Up
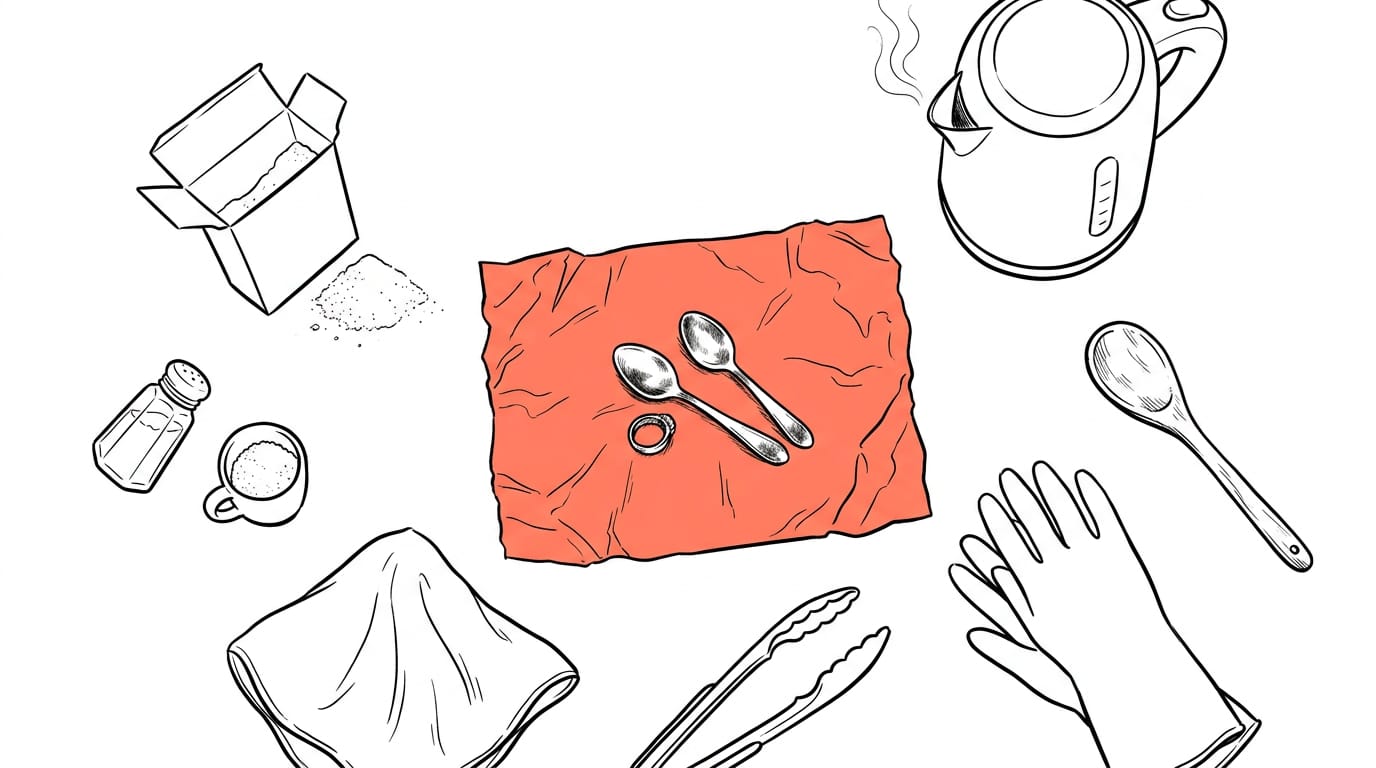
Gather everything before the silver goes in, so you aren’t hunting for the tongs while the water cools. The good news is that you probably have it all already.
Kitchen staples and tools you’ll need
You’ll need:
- Aluminum foil, the heart of the method
- Baking soda and/or salt
- Boiling or very hot water from the kettle
- A soft or microfiber cloth for drying
- Tongs, gloves, and wooden tools for handling the pieces
Stick to cupboard staples and kettle water. Nothing fancy is required.
Picking the right dish or pan
Choose a heatproof dish, pan, or sink, since the water will be hot. A lasagna or turkey pan works well here, while a pot or bucket suits large pieces.
Picture a home cook whose gravy boat has gone dull before Sunday lunch. She pulls the lasagna pan from the oven drawer, and the silver is gleaming before the guests arrive.
Be cautious about using a stainless steel sink, and reach for a heatproof dish instead.
How to lay the foil down
- Shiny side up. Lay the foil with the bright face up, not down, so it faces your silver.
- Line the container bottom. Cover the base of your dish or pan with foil so the silver rests on it.
- Wrap large items. If a piece won’t fit in the container, wrap it fully in foil.
What Is the Quickest Way to Clean Silver?
The quickest way to clean silver is a hot soak in a dish lined with aluminum foil, with salt and baking soda stirred into the water. The foil does the heavy lifting, so you need less scrubbing and more soaking.
How much salt and soda to use
Measure your salt and baking soda in tablespoons, matched to the cups of water in your dish or pot. Use salt only, soda only, or both, whichever you have on hand. For a bigger batch, keep the same ratio for each gallon.
Then cover the pieces fully with hot water.
Laying silver pieces on the foil
Think of a home cleaner who pulls a tarnished gravy boat and a set of teaspoons from the cupboard before a family dinner. Laid flat on the foil, the whole set gets treated in one soak. Check three things:
- Direct contact: every piece should touch the foil.
- No stacking: keep pieces in a single layer.
- Full submersion: hot water should cover every piece.
How long to soak or boil silver
Most pieces need anywhere from a few minutes to 30 minutes, and the tarnish level decides where you land. Lightly tarnished silver needs less time, while heavy tarnish needs the longer end.
Boiling on the stove follows the same timing, so keep an eye on the pot. You may notice fizzing and a faint sulfur smell as the tarnish comes away, and that’s normal. Set a timer and check early. Patience pays, but guessing doesn’t.
Other ways to use the method
- Baking soda paste: Mix baking soda with a little water and rub it gently over the silver.
- Hot water soak with foil: Use the foil-lined dish with hot water alone as a second option.
- Boiling in a pot: Place the foil, your salt and soda mix, and the silver in a pot, then bring it to a boil on the stove.
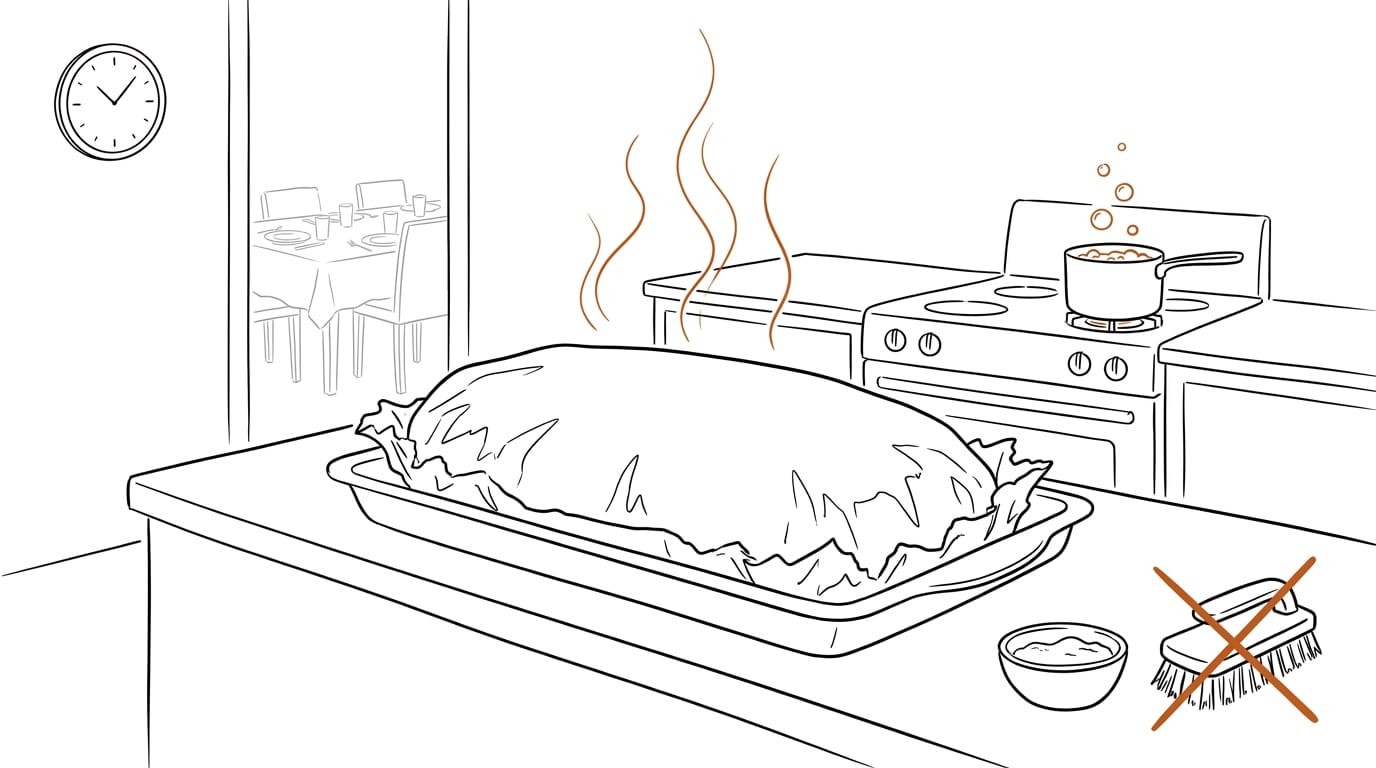
- Foil-wrapped large items: Consider a home cleaner with a heavy serving tray that won’t fit in the sink. Wrapping it in foil and covering it with the hot mix means one soak does the job, with no second round of rubbing before guests arrive.
Rinsing, Drying, and Caring Afterward
Once the tarnish is gone, the last few steps decide how long the shine lasts. Here’s how to rinse, buff, and store your silver, plus what to try if nothing seems to happen.
Rinsing and buffing until it shines
Rinse each piece under cold or clean water, paying attention to the crevices so no soda residue is left behind. Consider a home cook polishing the family gravy boat before Sunday dinner. One rinse and a quick buff, and it’s ready for the table in minutes.
Then dry each piece and buff it with a microfiber cloth using gentle, circular strokes. Buff gently rather than hard, since you’re polishing the surface, not scrubbing it. Dry first, then shine.
What to do with stubborn tarnish
If a patch stays dark, repeat with fresh foil. For heavy tarnish, replace the solution entirely rather than reusing it.
For engraving and tight corners, reach for a soft brush or cotton buds. A tarnish-removing cloth is handy for finishing small areas.
If nothing seems to happen, check that the silver is touching the foil, then swap in fresh solution and try again.
Keeping silver from tarnishing again
Protect clean silver from air and moisture by storing it in a soft cloth, then slipping it into anti-tarnish bags or an anti-tarnish cloth.
Think of a parent who packs a christening set away in a bedroom drawer. Wrapped this way, it comes out bright for the next family gathering instead of needing a full clean first.
Keep it wrapped rather than exposed. Clean, dry, and wrapped: that’s the whole routine.
Is Cleaning Silver with Aluminum Foil Safe?
For most everyday silver, yes, as long as you match the method to the piece. The real question is which silver you’re holding.
Pieces that clean up well
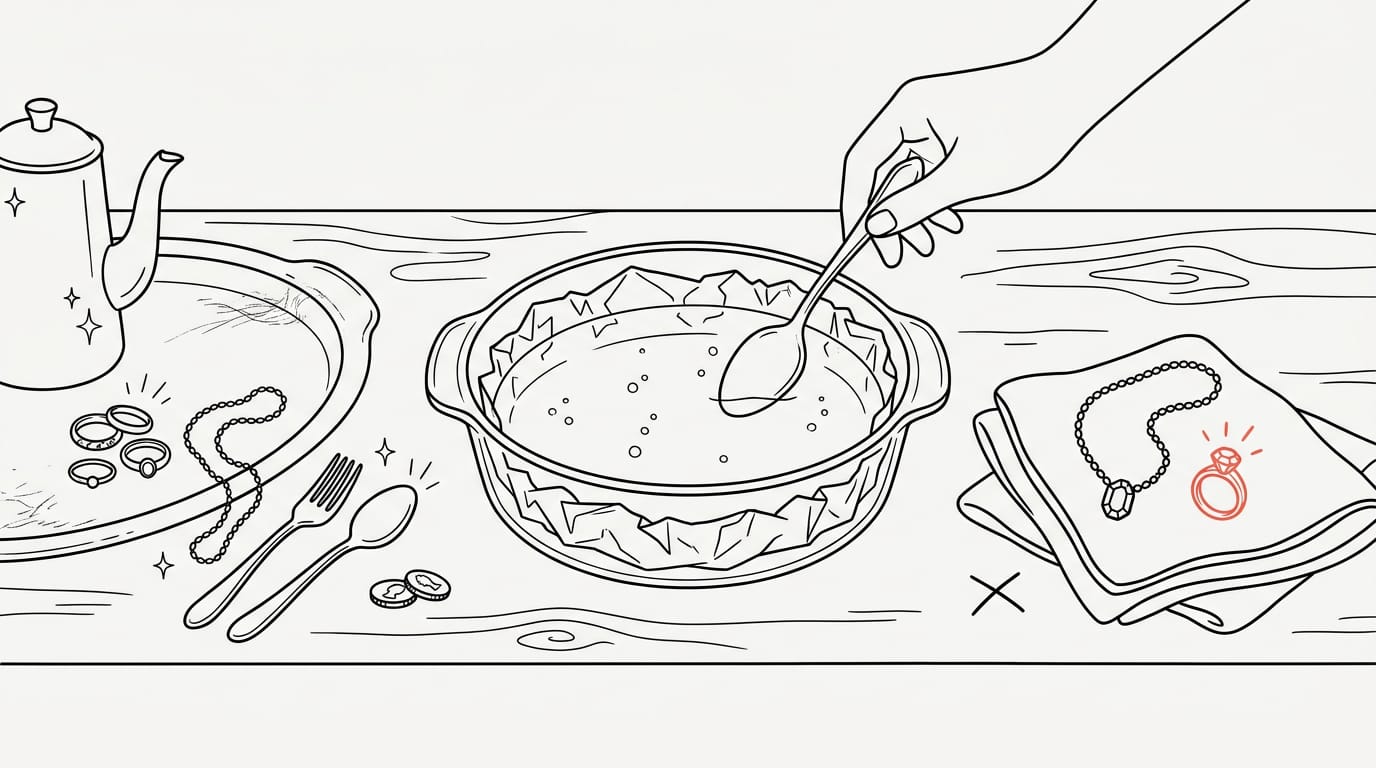
- Jewelry and flatware. Everyday rings, chains, forks, and spoons respond well.
- Trays and coffee pots. Larger serving pieces suit the bath, especially with an even dark film.
- Sterling and silver-plated. Solid sterling handles the bath well. Silver-plated items have only a thin coating, so go gently.
- Coins and small items. These clean up quickly, but check each one for wear first.
- Gemstone jewelry. Many soft or porous stones don’t handle heat or the bath well, so set them aside.
Care needed for antiques and heirlooms
Old pieces need extra care. Repeated scrubbing or soaking can wear away fine detail, so one gentle pass is usually enough. If a piece is valuable or sentimental, ask a professional or the dealer you bought it from first.
Silver-plated heirlooms may wear down, since the bath can strip the top layer. The darker tone in engraving is patina, the aged finish many collectors love. Decide whether you’re cleaning for shine or for history.
Protecting hands and judging results
The bath gets hot, so wear rubber gloves and lift pieces out with tongs, not bare fingers. A rotten egg smell is normal: it’s sulfur from the tarnish coming off, so open a window.
Consider a host who pulls a tarnished serving tray out before Sunday lunch. After the bath, the dark film is gone and the tray is ready for the table, with nothing new to buy.
Judge the result by the tarnish you removed, since the foil can’t fix deep marks. Scratches stay.
Extra Tips and Related Uses
Silver isn’t always about getting the shine back. A few simple tricks work in the other direction, and baking soda has a few of its own.
Tarnishing silver on purpose for detail
Most of the time, the goal is to get rid of tarnish. Sometimes, though, a little darkness helps. Tarnish that settles into engraved crevices accents the detail, so the pattern reads clearly instead of blending into the shine.
Picture a home cleaner with a treasured candlestick. After a thorough polish, the carved pattern has vanished, so they try the hard-boiled egg method: place the piece in a closed container with a hard-boiled egg, and the egg gradually darkens the metal.
A cling film cover over the container keeps the process contained.
The aim is to add a little dark, not erase it. Once the candlestick is toned, the design stands out again and looks deliberate rather than neglected. Less shine, more shape.
Other things baking soda can clean
Baking soda is a workhorse for jobs well beyond the silver drawer:
- Grill, oven, and burnt pans: Mix it into a paste with a little water, spread it over the baked-on residue, let it sit, then scrub gently.
- House cleaning tips: Use it as a gentle scrub for sinks, or sprinkle it on carpets to freshen them before you vacuum.
Picture a tenant who came home to a lasagne dish still caked on from last night’s rushed dinner. One paste, a short wait, and a gentle scrub, and the dish is ready for the next meal. No new bottle to buy, and no trip to the shop.
Cleaning silver with aluminum foil comes down to one simple swap: the tarnish lifts off the silver and clings to the foil. With the right setup and timing, a dull spoon can look fresh in minutes.
Rinse and dry each piece thoroughly, and skip anything on the unsafe list. Good aftercare keeps your silver bright for longer.
Your silver doesn’t have to stay dark. A sheet of foil and some hot water might be all it takes.
Questions
What is the quickest way to clean silver?
Soak silver in a heatproof dish lined with aluminum foil, using hot water with salt, baking soda, or both. Keep each piece in direct contact with the foil and fully submerged; most pieces brighten in a few minutes, though heavy tarnish can take up to 30 minutes.
How long to leave silver in baking soda and aluminum foil?
Soak silver for a few minutes to 30 minutes, checking it early. Light tarnish needs less time, while heavy tarnish may need the longer end of the range.
Why do tin foil and baking soda clean silver?
Tarnish is silver sulfide, formed when silver reacts with sulfur in the air. In hot water, the foil and silver participate in an electrochemical reaction that transfers sulfur from the tarnish to the aluminum; baking soda helps the solution conduct charge and supports the reaction.
Is cleaning silver with aluminum foil safe?
For most everyday silver, the method is safe when used carefully. Use extra caution with silver-plated, antique, or valuable pieces, and avoid soaking jewelry with soft or porous gemstones; the water is hot, so wear gloves and lift pieces with tongs.
More in Home Routines
- Gas Burner Cleaning: Heads, Caps, Grates and TestingGas burner cleaning can clear food-clogged ports and restore an even flame. See how to clean heads, caps, and grates, then test your flame safely at home.
- End of tenancy cleaning checklist: room by roomA room-by-room checklist for cleaning a rented home back to its check-in inventory, with what a landlord can and cannot charge for and the photographs to take.

Stain Finder: a free stain removal guide
Find your stain