Gas Burner Cleaning: Heads, Caps, Grates and Testing
Gas burner cleaning can clear food-clogged ports and restore an even flame. See how to clean heads, caps, and grates, then test your flame safely at home.

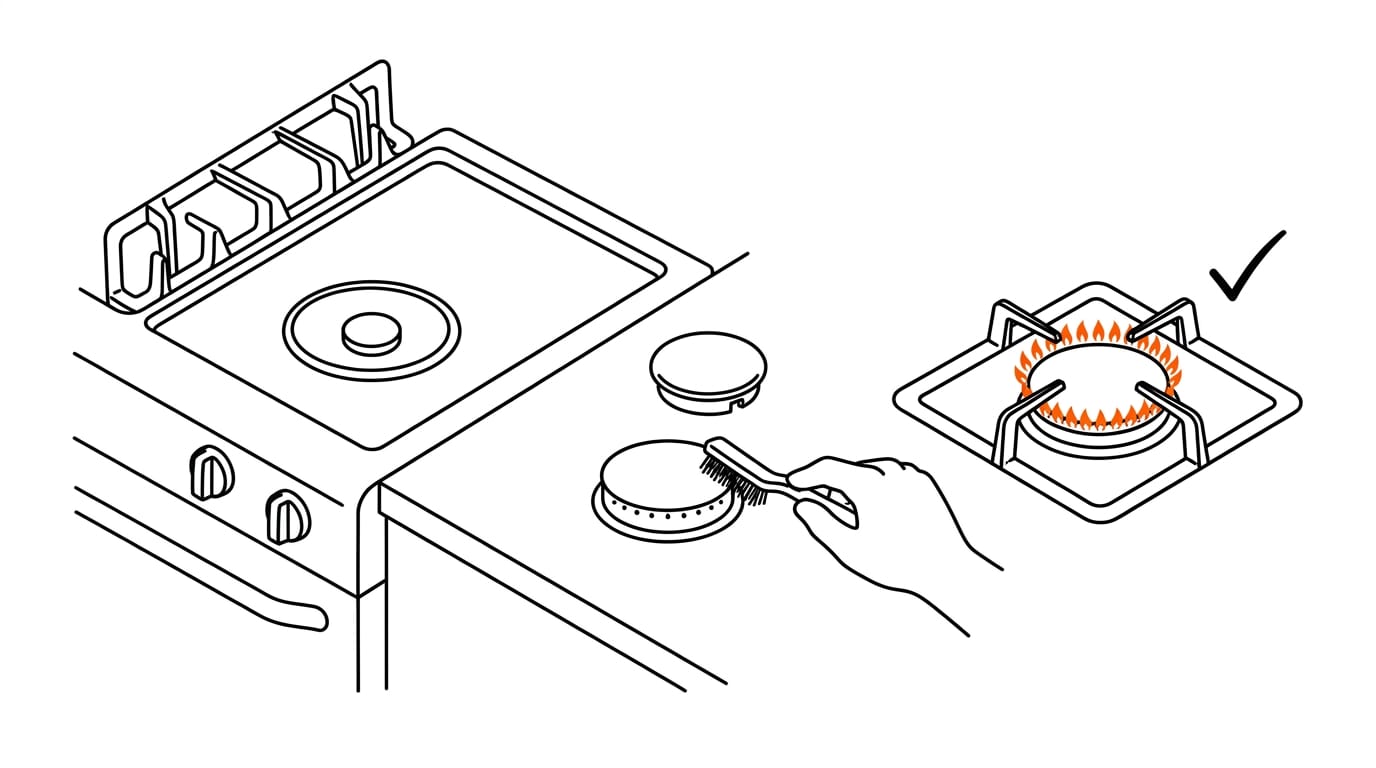
Gas burner cleaning means removing grease and food from the burner heads, caps, ports, grates, and cooktop so gas can flow and flames burn evenly. Turn off the stove and let it cool, clean gently with suitable products, clear clogged ports carefully, and rinse and dry every part before putting it back in place. Regular cleaning helps prevent buildup and supports reliable ignition, while checking that parts sit correctly and the flame looks even helps you spot problems before cooking.
Think of a pan of pasta sauce bubbling over onto the hob. Within minutes, the spill has baked onto the metal ring underneath, and the flame looks a little patchy.
Your gas burner is the part where the gas meets air to make that flame, and it’s easy for grease and food to block it.
The good news? It’s a job you can do yourself. Here’s what we’ll cover: the burner heads and caps, the grates, safe testing, burner-type differences, troubleshooting, and a quick stain-first method using cupboard basics.
When and Why Gas Burner Cleaning Matters
Gas burners do most of their work out of sight, so it’s easy to forget them until the flame starts acting up. Here’s why regular cleaning matters and how often you should do it.
What you gain from regular cleaning
Regular cleaning pays off in five ways:
- Even heat and flames. When the small holes where gas exits stay clear, the flame spreads evenly and your pan heats evenly too.
- Prevents grease buildup. Cleaning stops grease from settling in and hardening over time.
- Reduces fire hazard. Less grease near the flame means less fuel for an accidental flare-up.
- Avoids wasted gas. A burner that flickers or burns unevenly wastes fuel without giving you better cooking.
- Proper ignition. Clear burner parts help the flame catch reliably every time you turn the knob.
Consider a home cook who wipes the burner caps once the hob has cooled after frying bacon. The next fry-up lights first time and cooks evenly, with no crusted grease to fight through. Small habit, big payoff.
How often to clean after cooking
The goal isn’t a big scrub once in a while. It’s a quick habit after every meal.
- Clean after every use. Make it the last step of cooking, once the burners have cooled enough to touch safely.
- Residue hardens with heat. Spills and grease bake onto the burner, so they set harder the longer they sit.
- Regular schedule prevents buildup. Routine wiping keeps the layer thin instead of letting it build up.
- Two-minute wipe after cooking. A quick wipe takes about two minutes and stops grime from setting in.
Wipe it now, not later.
Get Set up and Stay Safe
A few quick checks keep you and your kitchen safe before the sponge ever comes out. Safety comes before the scrubbing, not after it.
Prepare the stove before you start
Work through these in order:
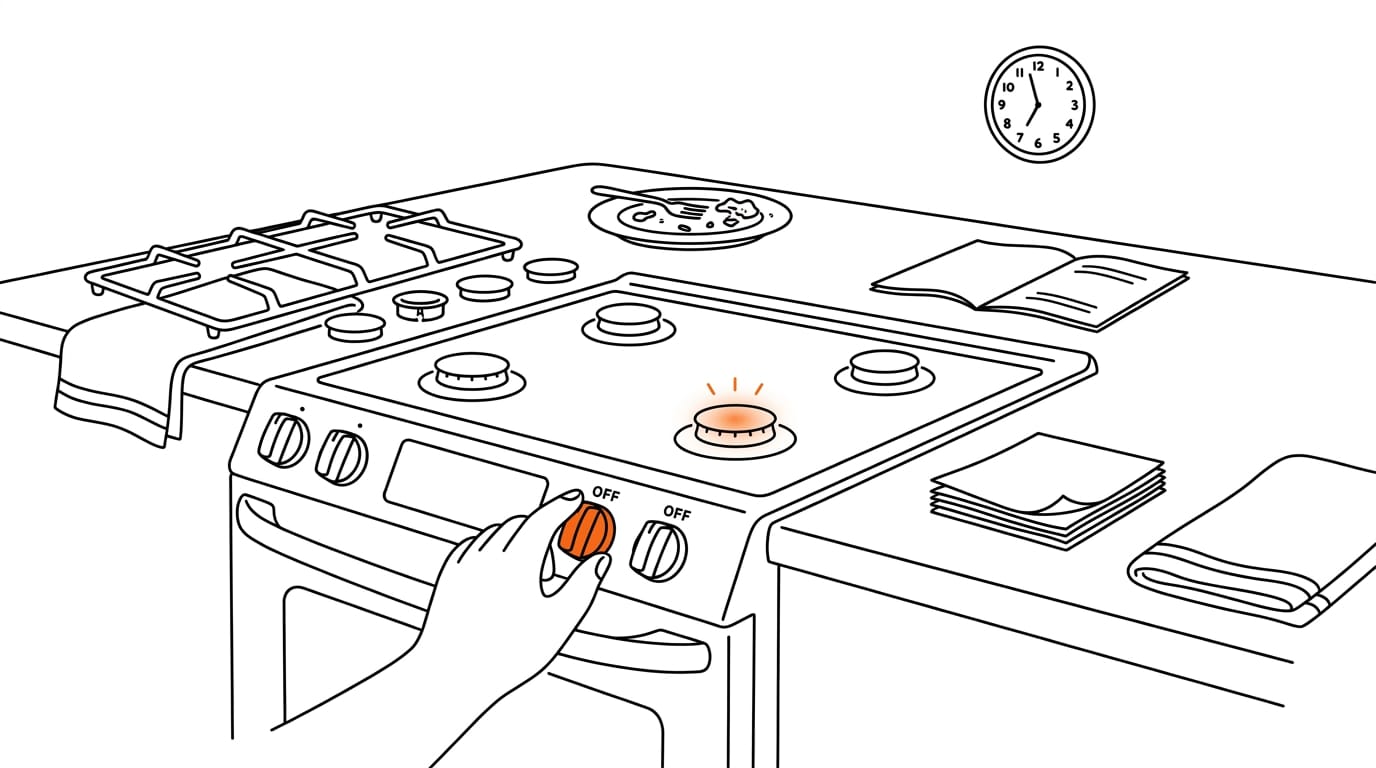
- Turn off the controls, or the gas supply if you can reach it.
- Confirm the cooktop is cool to the touch.
- Remove the grates and caps.
- Clear flammable items from nearby.
- Check your owner’s manual for model-specific advice.
Consider a parent cleaning the stove after a family dinner. They switch off every knob, wait for the grates to cool, and lift the caps off first, so the quick wipe stays just that.
Stay safe with cleaning products
Read the product label before you open the bottle, since it tells you what the cleaner is for. Wear gloves, and ventilate the area by opening a window or running the extractor fan. Never mix cleaners, even ones that seem harmless together.
Keep every cleaner away from flames, and use soft, safe tools like a cloth or non-scratch sponge.
Everyday safety habits for gas stoves
Make these part of your routine:
- Check for gas leaks regularly, and act right away if anything seems wrong.
- Fit child safety knob covers if little hands can reach the controls.
- Don’t leave the stove unattended while it’s on, and keep a fire extinguisher within easy reach.
- Match your cookware to the burner, using a pan that sits flat and fits the ring.
Safety is a habit, not a one-off.
Wash the Burner Heads and Caps
Whether your hob has sealed or open burners, we’ll start with the heads and caps, where grease and food spills settle first.
Using baking soda on burners
For example, a home cook who lets tomato sauce boil over can save the hob from a baked-on crust with a little baking soda and a brush. Try one of these two mixes:
- Baking soda and vinegar mix: Add a splash of vinegar to a spoonful of baking soda.
- Baking soda and water paste: Stir water into the baking soda until it spreads like a paste.
Spread your chosen mix over the heads and caps and leave it for 20 to 30 minutes. Then brush the grime away or wipe it clean. Work gently rather than hard: the mix does the loosening, so you won’t need force.
Which cleaner is best for gas burners?
The best cleaner for gas burners is a mild abrasive cleaner or a squirt of washing-up liquid, which handles everyday marks. For greasier build-up, you’ll need a few extra steps:
- Degreaser on the heads: Apply a degreaser to the heads, then wipe it off.
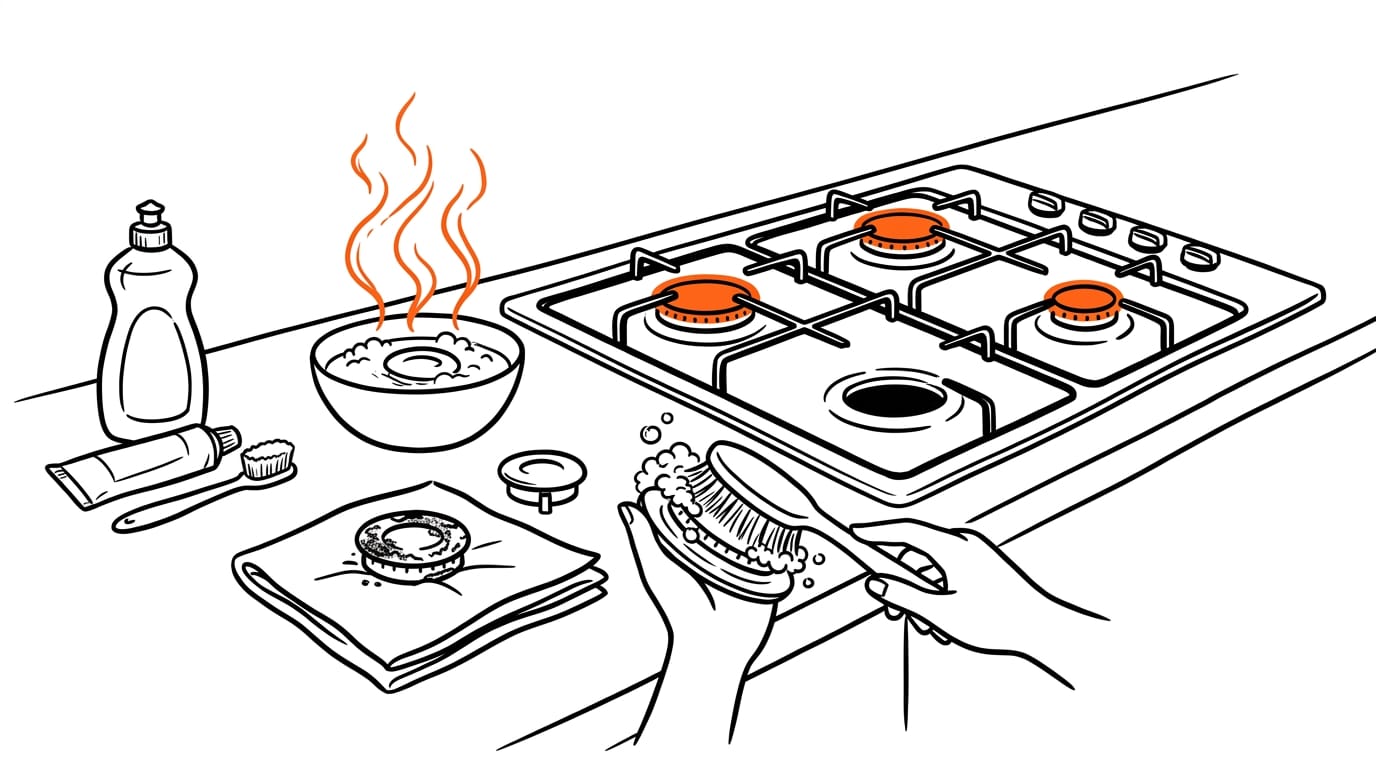
- Hot soapy water for dirty caps: Soak very dirty caps in hot soapy water until the grime loosens.
- Non-abrasive pad or brush: Scrub with a non-abrasive pad or brush to protect the finish.
No cleaner in the cupboard? You can clean a gas burner with toothpaste: rub a dab of plain toothpaste onto the head with a soft brush, then rinse it off.
Cast iron burners can follow the same gentle approach: soak heavy grime in hot soapy water, scrub with a non-abrasive pad, and dry them completely before reassembly.
Clearing clogged burner ports
Clogged burner ports, the small holes where the flame comes out, need careful handling. Keep these three points in mind:
- Use a straight pin or needle to clear each port.
- Never use a wooden toothpick, which can snap and leave splinters behind.
- Clean the burner base as well, so loosened debris doesn’t block the ports again.
Rinse and dry before putting back
Rinse each part under running water until the grime and cleaner are gone, then dry every piece with a towel before you reassemble the burner. Patience here pays off.
Cleaning the Rest of the Stove
Once the burners are clean, the rest of the stove needs attention too. Cleaning a gas oven is a separate job from the cooktop, so if that’s your question, it needs its own method and this section stays on the top of the stove.
Here’s how to handle the grates, cooktop, and knobs:
Caring for your stove grates
Grates take the worst of the spills, so scrub them with a non-abrasive pad. If yours aren’t cast iron, pop them in the dishwasher on the lower rack. Cast iron is different: it needs no soap or water at all.
Whatever the material, dry the grates completely, not just until the surface looks dry, before you replace them.
Removing grease from the cooktop
For everyday grease, let warm soapy water sit on the surface for five minutes so it loosens. For tougher spots, a baking soda paste needs a full 20 minutes to work, so give it that time rather than wiping too soon. Then finish with a sponge or cloth.
Picture a renter prepping a cooktop for a move-out inspection. Five minutes of warm soapy water lifts the week’s splatters, and a baking soda paste on the stubborn ring gets 20 minutes of work while they scrub the grates.
One quick wipe later, the cooktop is ready. No second round needed.
Gently cleaning igniters and knobs
Knobs can take a moist cloth, but the igniter needs a dry touch. Follow these steps:
- Disconnect the power first.
- Brush the igniter with a soft, dry brush.
- Keep the igniter dry throughout.
Gentle wins here.
Putting Everything Back and Testing It
Once everything is clean and dry, put it back as it came off, then prove it works. Don’t rush this part, because a cap that sits slightly off can stop the burner lighting evenly.
Reattach parts the right way
Think of a tenant who has scrubbed the burner caps after a pasta boil-over and wants dinner on the hob within the hour. The aim is parts that go back exactly where they came from, not parts that look roughly right.
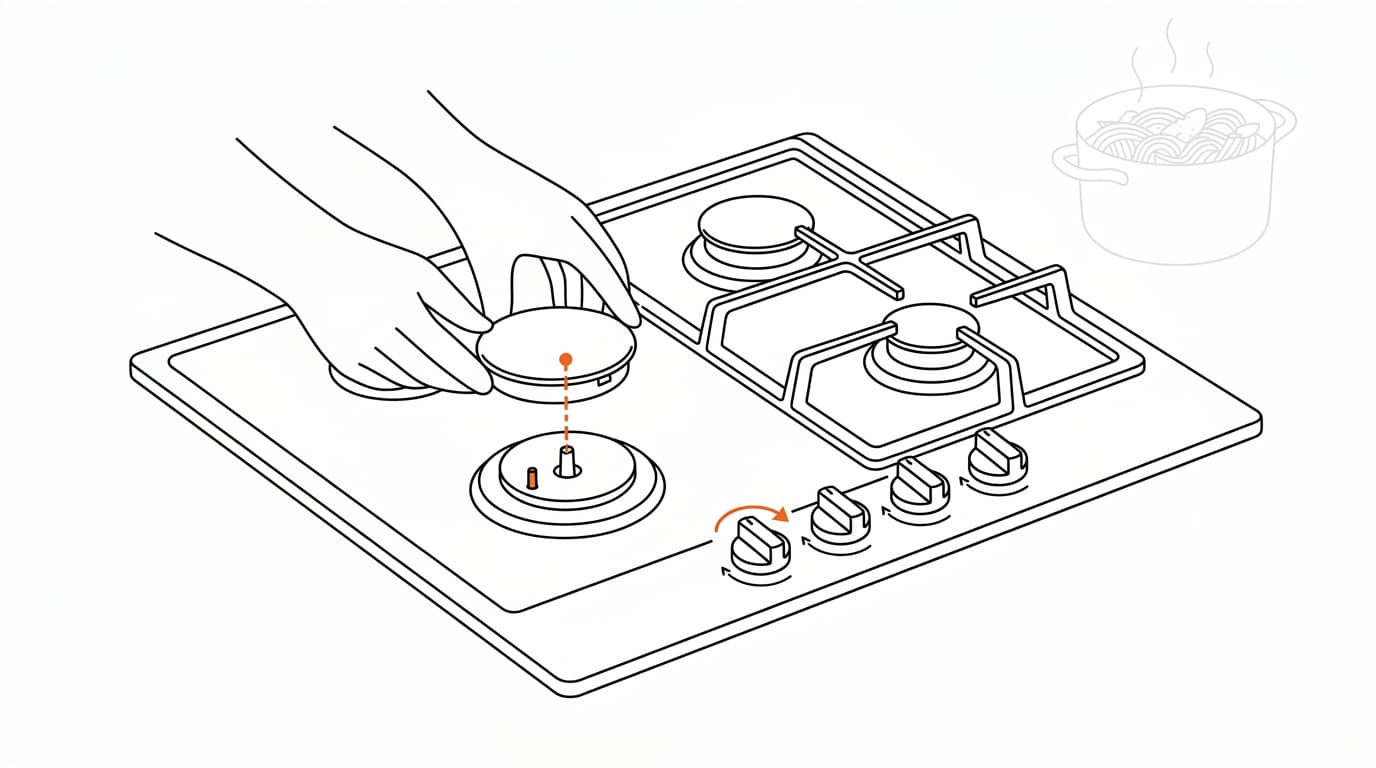
- Align each cap with the markers or pins on its burner.
- Press it down. It should sit flush and barely move when you nudge it.
- Reposition each grate so it sits securely over its burner, with no rocking.
- Realign the control knobs so they turn smoothly before you light anything.
Checks to run after cleaning
Start with a visual inspection of each burner and its parts, checking for anything loose, misplaced, or damaged. Then run a soap-bubble test for gas leaks.
Mix washing-up liquid with water and brush it over the connections while the gas is on. Bubbles mean gas is escaping, so turn the gas off straight away.
Last, check the igniter and the flame, which should look even all the way round. If your gas stove isn’t igniting, the likely culprits are a cap that isn’t seated properly, a blocked opening, or a damp or dirty igniter.
Dry the igniter, recheck the caps, and try again.
If you smell gas, get everyone out of the room and call the gas emergency line straight away. Call a gas engineer if bubbles keep appearing or the stove still won’t light after these checks. Don’t guess with gas.
Brands and Products Worth a Look
Gas cooktops vary more than you might expect, so knowing what’s on the market helps you clean the right way from the start.
Popular brands and cooktop features
Faber and Maytag are two names you’re likely to come across. When you compare models, it’s less about the logo and more about how the cooktop is put together, so look at these features first:
- Faber gas appliances: Check the manual for your exact model before using any cleaner, since guidance can vary by unit.
- Maytag cooktops: Compare the layout and finish alongside the brand name before you decide what suits your kitchen.
- Protective finish: This is a surface coating meant to make spills easier to wipe up before they bake on.
- Easy-clean grates: These make the soak-and-rinse step simpler, so you spend less time at the sink.
- Power and simmer burners: A power burner handles high heat for fast boiling, while a simmer burner keeps a low, gentle flame for sauces.
- Burner count collections: Brands often group cooktops by burner count, so compare the layout as well as the number of burners.
Consider a busy parent whose pasta water boils over: the grates come off, soak in warm soapy water while the burner caps dry, and dinner stays on schedule. Know your model first.
Keeping your burners clean is about more than looks. A clear, steady flame means more even cooking and less scrubbing later, and testing everything once it’s back together gives you confidence it’s working as it should.
Whether you’re dealing with a fresh spill or a months-old build-up, you now have a clear method and the know-how to work through it safely.
A clean burner is a happy burner, and that means a hob you can trust every time you cook.
Questions
What is the best way to clean a stovetop?
Turn off the controls and wait until the stovetop is cool. Wipe everyday grease with warm, soapy water, and leave a baking soda paste on stubborn spots for 20 minutes before wiping with a soft sponge or cloth.
What is the best cleaner for gas burners?
Use mild dish soap or a mild abrasive cleaner for everyday marks, applying it with a non-abrasive pad or brush. For greasy buildup, use degreaser on the burner heads or soak dirty caps in hot, soapy water, then rinse and dry everything completely.
What is the best thing to clean the top of a gas stove with?
For everyday grease, let warm, soapy water sit on the cool stovetop for five minutes, then wipe it with a sponge or cloth. For stubborn spots, leave a baking soda paste on the surface for 20 minutes before wiping.
How to clean hob rings?
Turn off the stove, let the hob cool, and remove the rings or burner caps. Soak dirty caps in hot, soapy water, or apply baking soda paste for 20 to 30 minutes, then gently brush, rinse, and dry all parts completely before refitting.
How to clean a gas oven?
Turn off the gas and let the oven cool completely before cleaning. Remove racks and loose debris, then use the oven manufacturer's recommended cleaner and follow its label instructions; avoid getting cleaner on gas burner components or igniters, and ventilate the room.
How do you clean a clogged burner?
Turn off the burner and let it cool, then remove the cap and head if your model allows. Clear each burner port carefully with a straight pin or needle, clean away loosened debris, and rinse and dry the parts before reassembly; do not use a wooden toothpick.
How do I clean my cast iron gas burners?
Remove the cast-iron burner parts only when the stove is off and cool. Soak heavy grime in hot, soapy water, scrub gently with a non-abrasive pad, rinse, and dry the parts completely before putting them back.
My gas stove isn't igniting. What could be the problem?
A gas stove may not ignite because the burner cap is misaligned, the burner ports are blocked, or the igniter is damp or dirty. Turn off the burner, check that the cap sits flush, clear any blockage, and let the igniter dry; if you smell gas, leave the area and call the gas emergency line.
More in Home Routines
- Cleaning Silver with Aluminum Foil: A Complete GuideCleaning silver with aluminum foil uses baking soda and hot water to lift tarnish; get the quick setup, safe-item checks, and aftercare for a bright finish.
- End of tenancy cleaning checklist: room by roomA room-by-room checklist for cleaning a rented home back to its check-in inventory, with what a landlord can and cannot charge for and the photographs to take.

Stain Finder: a free stain removal guide
Find your stain