Cleaning Plastic Step by Step, with Pantry Staples
Cleaning plastic tackles food stains, smells, cloudy clear plastics, and safe disinfection with cupboard ingredients, plus when to replace old containers.

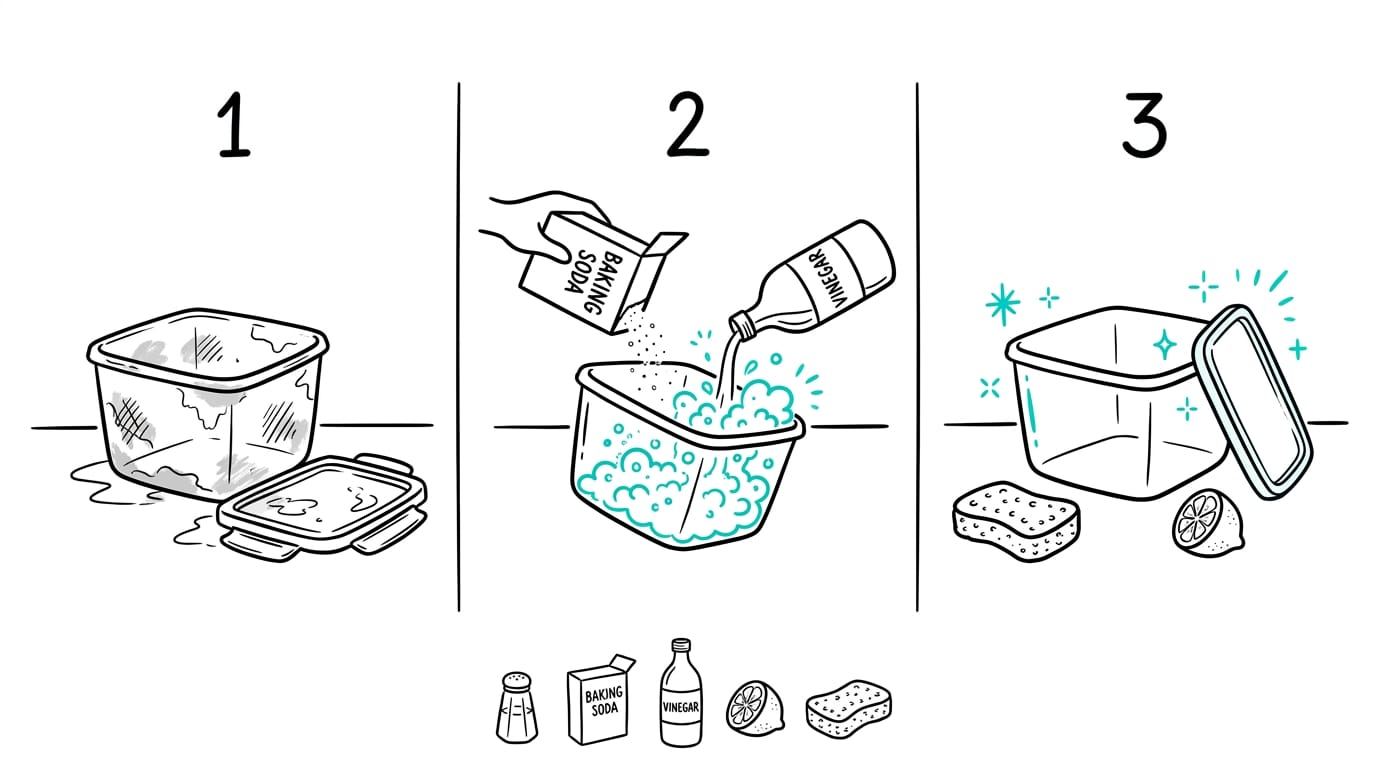
Cleaning plastic means choosing a gentle method that suits the plastic type and the problem, from everyday grime to stains, odors, and cloudy clear surfaces. Spot-test cleaners, soak stains before gentle scrubbing, rinse thoroughly, and use a labeled disinfectant when germ control is needed; avoid abrasives and heating food in plastic. These habits help keep plastic usable and clear, reduce residue and damage, and make it easier to know when an old item should be repurposed or replaced.
Picture this: you’ve just pulled a takeaway container from the back of the fridge, and the lid has an orange ring that won’t budge. Or your clear jug has gone cloudy, and no amount of scrubbing seems to help.
Plastic looks simple, but different types need different care.
The good news is that many plastic problems can be tackled with ingredients already in your cupboard.
In this guide, we’ll cover cleaning by plastic type and job, from everyday kitchen containers and clear plastics to stains, odours, disinfecting, and safety.
Every problem gets a stain-first method using what you already have on hand, so you can act quickly.
Cleaning Plastic Step by Step
Identify the plastic type first, since the base label shows what it can handle.
Follow this routine for most items
- Spot test first: Try your cleaner on a hidden patch so any mistake stays out of sight.
- Pre-wet heavy soils: Rinse crusted food in warm water so it loosens first.
- Apply cleaner and soak: Let it soak rather than scrubbing harder.
- Rinse with clean water: Remove every trace of cleaner.
- Dry and polish: Buff dry with a soft cloth for a clear finish.
- Cupboard-only quick method: For small jobs, use what’s under the sink and skip the shop.
Can I mix vinegar and dish soap?
Rather than mixing cleaning vinegar and Dawn in one bottle, wash with soap, rinse, then use vinegar if the job needs it. Keep them apart.
- Full strength for grease: Use dish soap undiluted on greasy spots.
- Daily dilution: Dilute your cleaner with warm water for everyday wiping.
- Light dilution for fingerprints: A weaker mix handles light marks.
- Mild dish soap and warm water: A drop of mild dish soap in warm water handles general washing.
- Hot water and grease-cutting liquid: Hot water helps a grease-cutting liquid on tough residue, if the label allows heat.
- Homemade degreaser: To make your own, mix warm water with a little dish soap, apply it, then rinse.
Brushes and cloths that won’t scratch
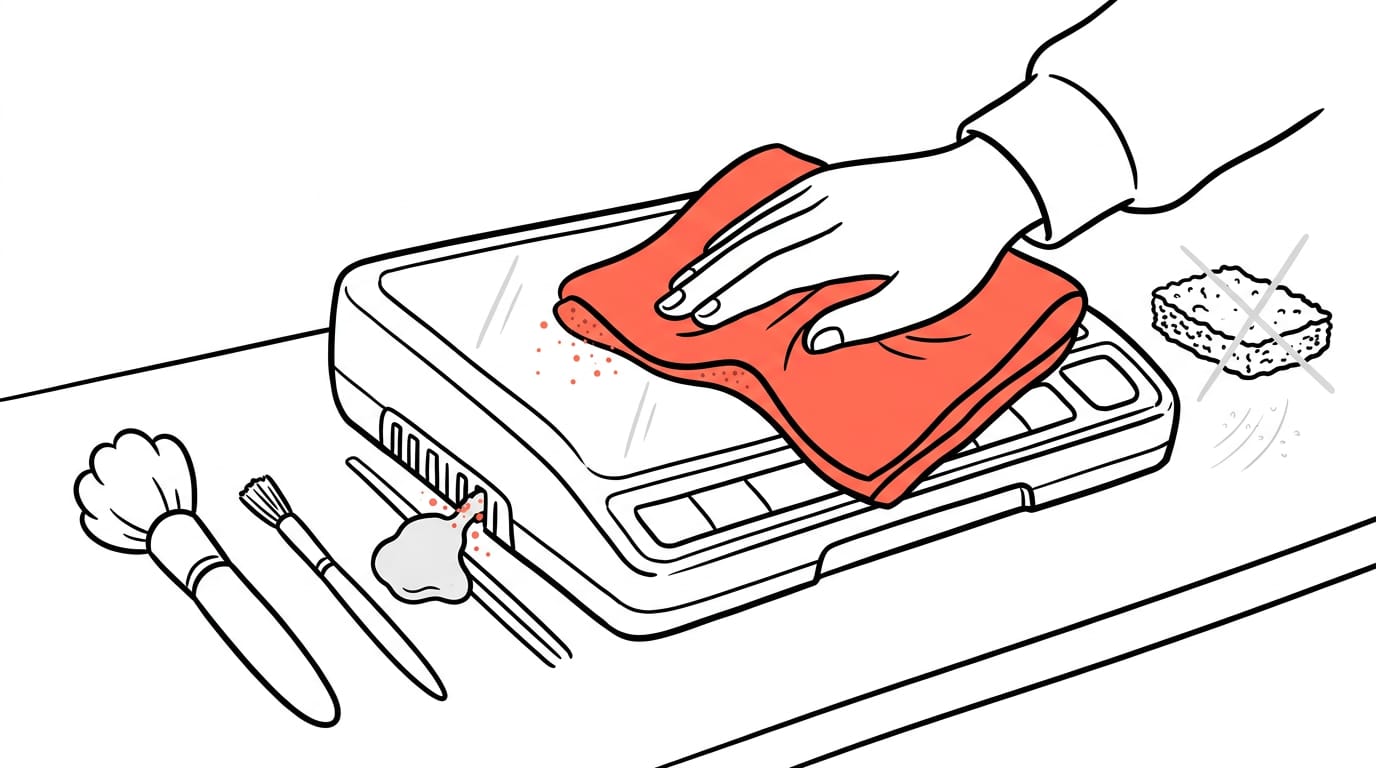
Scratches dull plastic for good, so pick tools that treat it gently. Gentle wins.
- Soft bristle brush: For crusted corners and textured lids.
- Non-abrasive pad or cloth: For everyday wiping.
- Microfiber cloths: Soft for drying and polishing.
- Avoid abrasives: Scouring powders and rough scrubbers leave fine scratches that trap dirt.
- Tiny nylon brushes: For tight spots like hinges and vents.
- Cleaning putty: Presses into crevices to lift dust and grit.
Earbud putty can lift dust from small gaps, but spot test it first, since plastics vary. As for making your own, we won’t guess at a homemade recipe here, so a ready-made putty is the simpler route.
Washing kitchen plastics by hand
Think of a parent washing a lunchbox by hand the night before school. A quick brush into the lid threads means it’s clean by morning.
- Dish brush or wand: Reaches inside bottles and around the base.
- Reach straws and lid threads: A thin brush clears the spots where food hides.
- Use when no dishwasher-safe label: Hand-wash anything without that label, so you’re never guessing.
Disinfecting Plastic Safely Around Food
Cleaning and disinfecting aren’t the same job. Here’s how to handle plastic around food and pets.
Why cleaning isn’t the same as disinfecting
Many cleaners may not disinfect at all. Picture a parent wiping a highchair tray with a spray that only cleans. It’s about killing germs, not just removing them.
To disinfect properly:
- Use a dedicated disinfectant, not a general cleaner.
- Follow the contact time on the label, keeping the surface wet the whole time.
- Wear protective equipment, such as gloves.
Rinsing surfaces that food or pets touch
Once you’ve disinfected, rinse thoroughly with clean water so no residue remains. This matters most for:
- Food contact surfaces: lunchboxes, cutting boards, and storage containers.
- Pet surfaces: water bowls and feeding mats.
Consider a dog owner who refills a water bowl straight after disinfecting it. Rinsing first means the next drink is just water.
How chemicals seep out and affect health
Some plastics can release chemicals into food. BPA (bisphenol A) is the chemical many alternatives were developed to replace, but those swaps aren’t always safer.
A health conundrum of bisphenol A and its alternatives highlights that most mainstream substitutes may carry similar concerns, including hormone-related, metabolic, reproductive, and neurodevelopmental effects.
So avoid heating food in plastic containers. Migration of Chemical Compounds from Packaging Materials into Packaged Foods explains that higher temperatures can speed up how chemicals move into food.
Picture a parent microwaving a toddler’s pasta in its plastic tub. Spooning it onto a plate takes moments and keeps food away from the plastic. Worth the extra step.
Running Plastic Through the Dishwasher
Your dishwasher can handle most plastic, but only if the water reaches every surface and drains away.
Why plastic holds stains and water
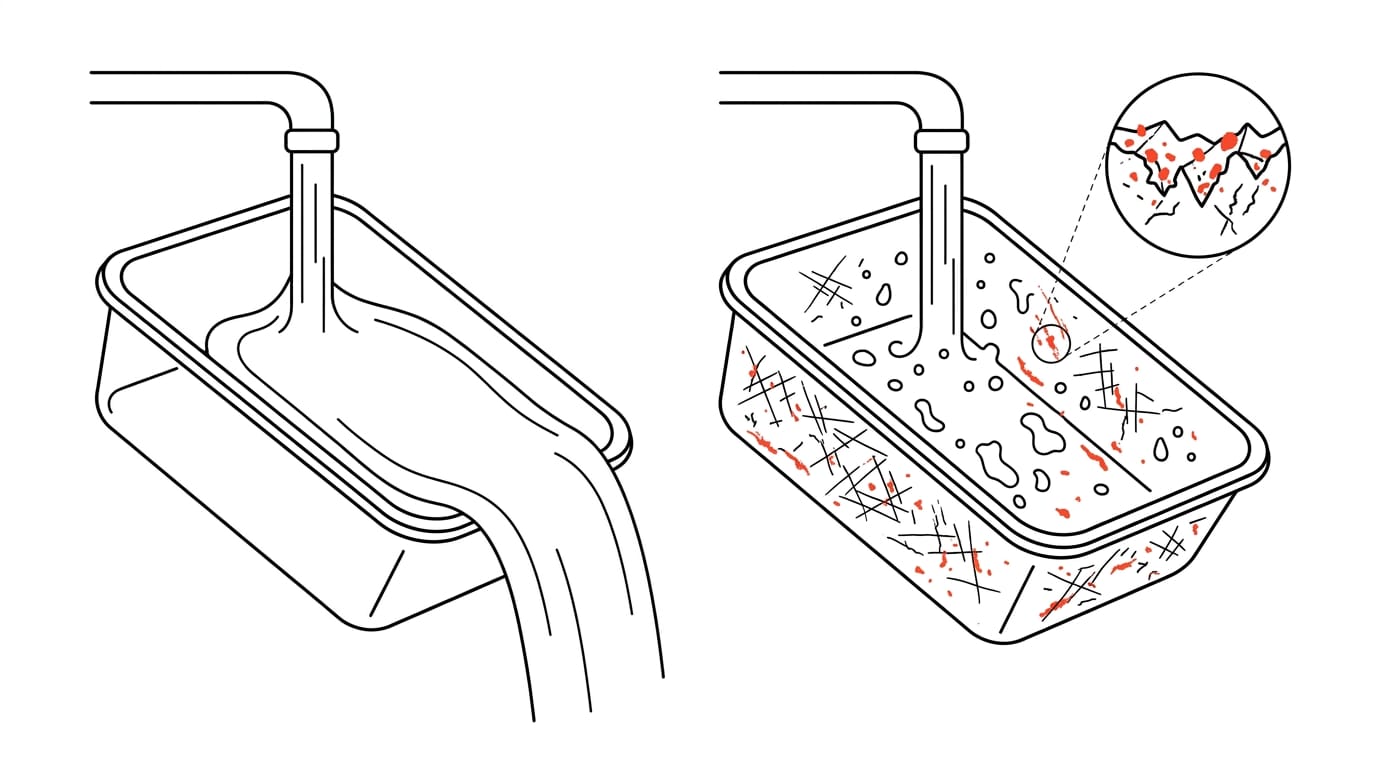
Plastic may look smooth, but its surface is rough at a microscopic level. Scrubbing with a hard brush or abrasive pad makes this worse, because every pass leaves tiny scratches.
Those scratches trap stains and moisture, so a container can look clean yet still hold an orange tint from last night’s tomato sauce. Smooth is your friend.
Water is the other problem. Water sheeting is when water spreads into a thin, even film that runs off. With poor sheeting, water clings in droplets that dry as spots and streaks. It’s less about scrubbing and more about draining.
Smart ways to load plastic items
Good loading gives the water a clear path in and a clear path out. Keep these in mind:
- Top rack placement. Put plastic on the top rack, where it’s easier to position and less likely to shift.
- Dirtiest side toward spray. Turn the most soiled surface toward the spray arm so the water hits it first.
- Angle for drainage. Tilt containers so water runs off instead of pooling.
- Don’t overcrowd. Leave gaps so water can reach every surface.
- Mesh bag for small items. Lids, clips, and bottle caps go in a mesh bag so they don’t slip through or get lost.
- Wire rack to hold items down. Use it to keep lightweight pieces from tipping or shifting mid-cycle.
Consider a parent who runs a stack of lunchbox containers after a tomato pasta night.
Turning the sauciest one toward the spray, tilting the lids, and tucking the small clips into a mesh bag means everything comes out clear the first time, with no scrubbing before bed.
Getting Rid of Stains and Smells
Plastic can hold onto both marks and smells, so tackle the stain first and the smell second. Here’s how to do both with what’s already in your cupboard.
Lifting stubborn stains from plastic
Think of a parent who opens the lunchbox to find last night’s pasta sauce has left an orange ghost on the lid. A quick soak can lift it before the box heads back into the school bag, with no trip to the bin and no new box.
Two simple soaks do the heavy lifting:
- Diluted chlorine bleach soak: Dilute the bleach as the product label directs, then soak the plastic until the stain begins to lift.
- White vinegar and water soak: Mix white vinegar with water and soak the plastic the same way, handy when you’d rather skip the bleach.
Use one soak at a time and rinse well before you switch to the other. One habit saves you the trouble: avoid microwaving tomato sauce in plastic, since heat is what can set the colour in.
The order matters: soak first, then scrub, not the other way around. Soaking loosens the mark so scrubbing has less work to do.
The same soaks can help yellowed or discoloured old plastic, so give them a go before you write the container off.
Clearing out odors that linger
Consider a host whose picnic box still smells of onion the next morning. Stir baking soda into a little water to make a baking soda paste, spread it over the inside, and leave it to work before you rinse.
Scrub gently with a microfiber cloth or a soft brush, then rinse. Fresh box, ready for the next picnic.
Bringing Back the Shine on Clear Plastic
Clear plastic shows every smudge and scratch, so the fix depends on the damage. Here’s how to keep it clean and pick the right scratch remover.
Caring for acrylic and polycarbonate
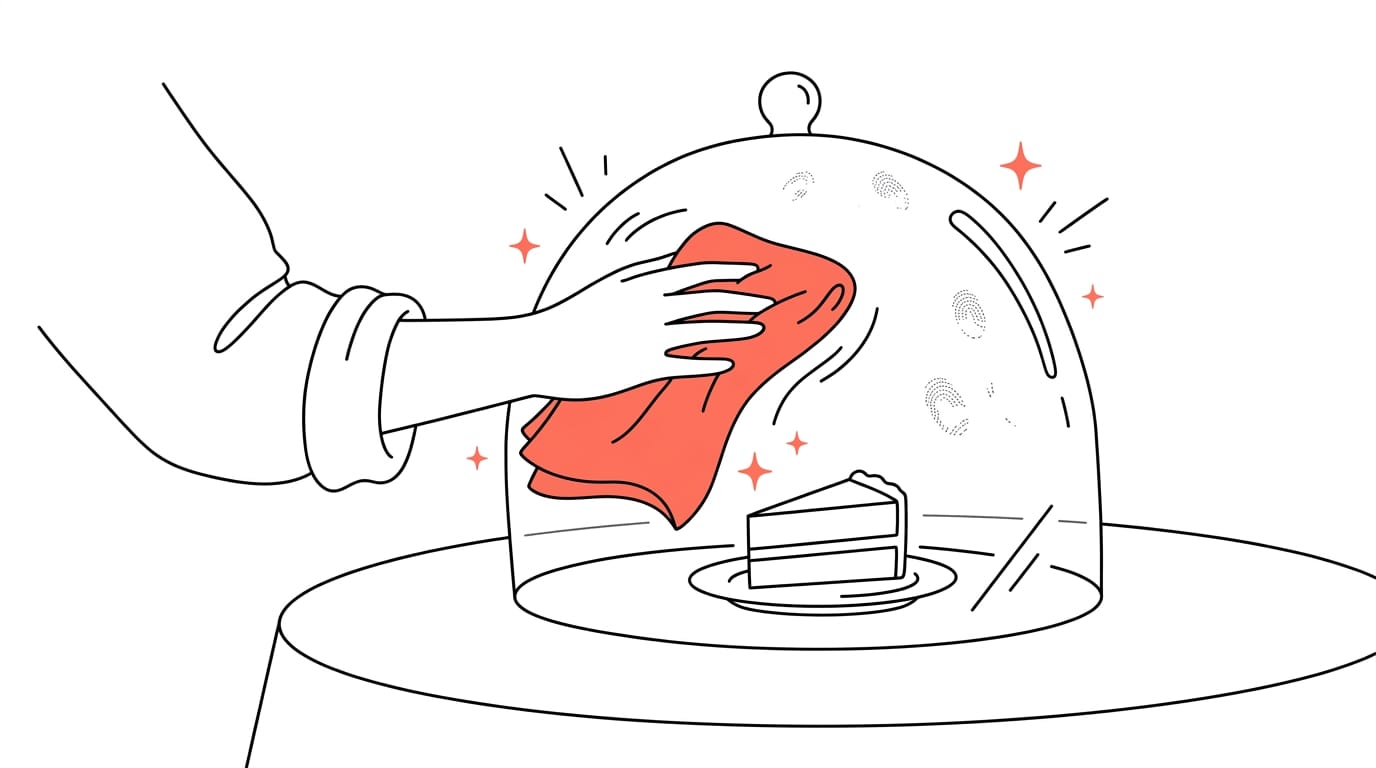
Acrylic and polycarbonate both respond best to gentle handling, since harsh scrubbing makes a good surface look worse. For smudges, a soft microfiber cloth and plain water usually do the job.
Dried residue needs a drop of mild washing-up liquid and a rinse. Scratches are covered below.
For example, a host who wipes sticky fingerprints off a polycarbonate serving dome after a party keeps it sparkling for the next gathering.
Use a plastic-specific cleaner where you can, meaning one labeled for acrylic or polycarbonate. Skip abrasive powders and scouring pads.
Dry with a clean, soft cloth in one direction for a streak-free finish. For extra shine, buff a little plastic polish lightly rather than pressing hard. Less pressure, more shine.
Matching scratch removers to the damage
Clean and polish for everyday haze and light marks. Save stronger products for real damage.
A scratch remover is a polishing product that makes marks less visible. For a light scuff, try a fine scratch remover made for plastic first.
A heavy scratch remover is for deeper gouges, and stronger products take off more surface. Match the product to the depth of the scratch, not how much it bothers you.
Consider a renter with a faint scuff on a clear acrylic shelf: a fine remover and a little buffing may be enough, so there’s no need for the heavy stuff.
Skip these products on coated plastic, since they can dull or strip finishes such as anti-scratch or tinted coatings. If you’re unsure, check the maker’s guidance first.
When to Replace or Reuse Old Plastic
Not every container in the cupboard deserves another wash. Some should head to recycling, while others can take on a new job around the house.
When to retire, recycle, or repurpose plastic
Sort each old container with three quick checks in mind:
- Warped or misshapen items. If a container no longer sits flat, won’t stack, or its lid won’t snap shut, it can’t keep food sealed. The question isn’t whether it still holds together, but whether it still seals. If it doesn’t, let it go.
- Check local recycling. Recycling rules differ from one area to the next, so look up what your local scheme accepts before it goes in the bin. Don’t assume a plastic tub is welcome just because it’s plastic.
- Repurpose containers for storage. A tub that no longer seals for food can still earn its keep as dry storage. Think of a parent who keeps a slightly warped lunchbox tub for the kids’ craft beads and spare buttons. It never touches food again, and no new box needs buying.
Plastic doesn’t have to be a kitchen headache. Once you know the type, match the method to the job, and treat stains early, your containers stay clean, clear, and safe for food.
Whether you’re blotting a fresh spill or deciding an old tub has earned its retirement, you’ve got a clear plan to follow.
A little care now means fewer containers in the bin and cleaner meals on the table.
References
- A health conundrum of bisphenol A and its alternatives — oaepublish.com (2025)
- Migration of Chemical Compounds from Packaging Materials into Packaged Foods: Interaction, Mechanism, Assessment, and Regulations — pmc.ncbi.nlm.nih.gov (2024)
Questions
What is a good homemade cleaner for kitchen cabinets?
For kitchen cabinets, mix a little mild dish soap with warm water and wipe with a soft cloth. For greasy spots, apply dish soap undiluted, then rinse with clean water and dry; test a hidden area first.
How can I make my own degreaser?
Mix warm water with a little dish soap, apply it to the greasy surface, then rinse it off. For stubborn grease, dish soap can be used undiluted on the spot, provided the surface can tolerate it.
How to make pure magic cleaner?
A common homemade “Pure Magic” cleaner uses equal parts water and white vinegar, sometimes with a small amount of dish soap. Avoid using vinegar on surfaces that can be damaged by acids, such as natural stone, and never mix it with bleach.
How to make a cleaning putty?
There isn’t a reliable homemade recipe for cleaning putty; use a ready-made cleaning putty instead. Check its instructions and test it on an inconspicuous spot before use, since surfaces vary.
How do you wash putty?
Follow the putty maker’s care instructions, as cleaning putties differ by product. Many are meant to be discarded once dirty or no longer tacky rather than washed, since water can affect their texture and cleaning ability.
Can I mix cleaning vinegar and Dawn dish soap together?
It’s better not to mix cleaning vinegar and Dawn in one bottle. Wash with dish soap, rinse, and use vinegar separately afterward if needed.
Does earbud cleaning putty work?
Yes, earbud cleaning putty can lift dust and debris from small gaps and crevices. Test it on a hidden spot first, since different plastics may react differently.
Is car cleaning putty reusable?
Often, yes. Car cleaning putty is generally reusable until it becomes too dirty or loses its tackiness; follow the product instructions and avoid pressing contaminated putty back onto the surface.
Sources
More in Floors & Carpets
- How to Get Hair Dye Off Wood Floor FastHow to get hair dye off a wood floor fast: choose a cleaner based on the finish, lift fresh drips safely, and avoid damage to nearby surfaces.
- Cleaning Grout with Baking Soda and Hydrogen Peroxide GuideCleaning grout with baking soda and hydrogen peroxide lifts grime with a simple paste; see when it works, what to avoid, and which method fits your grout.
- Wood Heater Cleaning: Ash, Glass, Flue and Safety BasicsWood heater cleaning gets easier with better burning habits, safe ash removal, glass cleaning, plus simple checks for creosote and worn stove parts.
Stain Finder: a free stain removal guide
Find your stain