How to Remove Paint from Wood Safely, Step by Step
How to remove paint from wood safely: check for lead, choose a stripper or heat, then neutralize residue, sand smooth, and protect the bare wood.
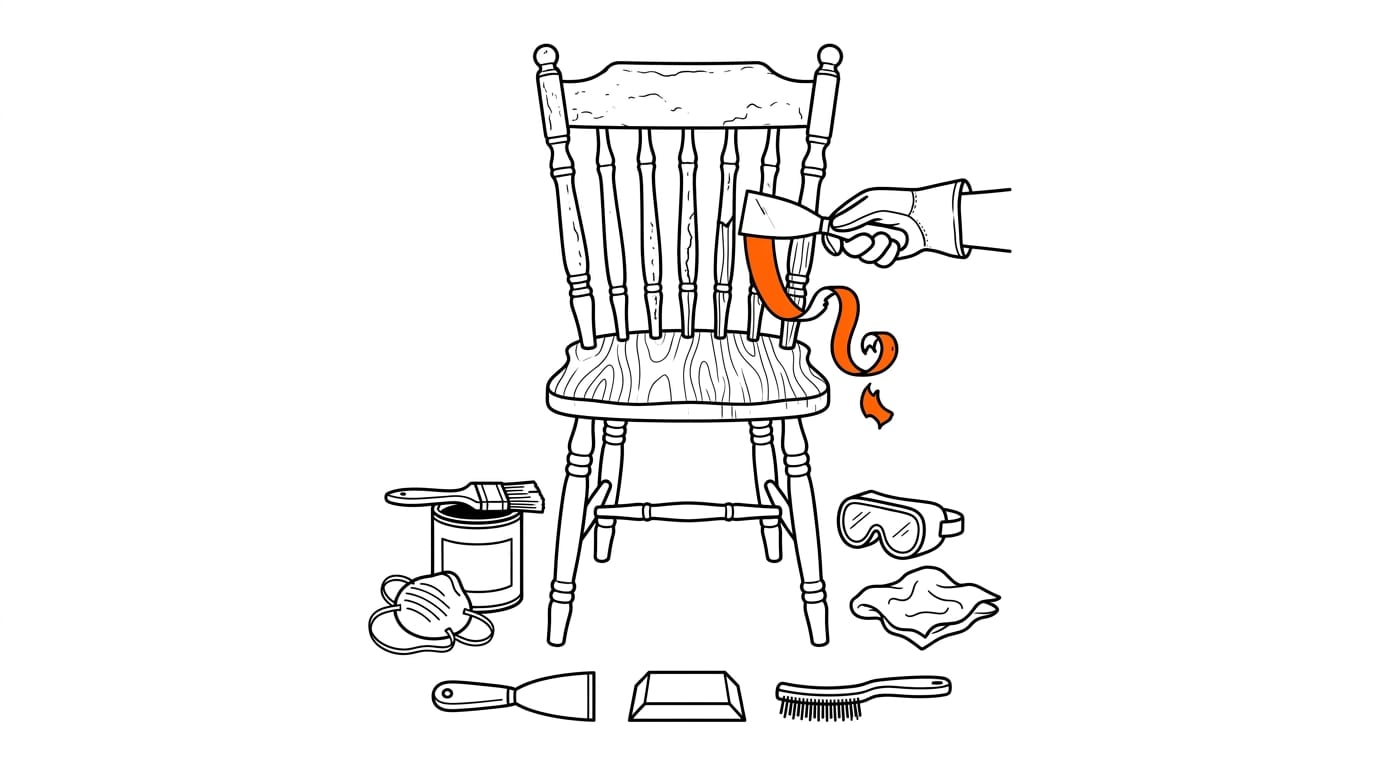
Removing paint from wood means lifting old or dried paint while protecting the wood beneath it. First check that the piece is worth stripping and treat old paint as a possible lead hazard; then use a suitable remover or heat method, clean away residue, and sand gently before refinishing. Working in this order, with patience and light pressure, helps prevent damage and preserve the wood’s character.
Picture a dining chair that’s worn five coats of paint over the years, each one a different shade of ‘nobody’s favorite.’ Getting back to the bare wood is a lot like peeling back the layers of an old onion, except you want to keep the piece in one piece.
If the paint is still fresh, you may be able to catch it before it sets, but older finishes need a clear plan.
Removing paint from wood works best when you go in the right order: decide whether it’s worth it, check for lead, strip or heat the old finish, clean and neutralize, sand smooth, and then finish with care.
Here’s how each step fits together, so you can tackle your piece with confidence.
Deciding Whether to Remove Paint from Wood
Before you reach for a scraper, decide whether stripping is worth the effort. Here’s how to tell, and what to do if you only want a fresh look.
Checking whether a piece is worth stripping
Stripping only pays off with good wood underneath. Damaged or rotten timber won’t be rescued by removing the paint, and not every piece is suitable, so check before you start.
Think of a first-time renter who finds a painted pine chest left behind in the flat. Checking the wood first saves a weekend of scraping on something that was never going to look right.
Antiques need extra care. A Country Living guide warns that over-restoration is one of the quickest ways to devalue an antique, so refinishing an antique can lower its value.
Can I paint over painted wood furniture?
Often, yes, as long as the existing paint is sound. The job’s less about covering the old finish and more about preparing it. Run through these checks first:
- Old wax: Wipe waxed pieces with a paint thinner first, or the new paint won’t hold.
- Shellac test: Dab denatured alcohol on a hidden spot. If the finish softens, it’s likely shellac, a traditional wood finish.
- Re-amalgamation: On shellac, a fresh coat can blend the old layer into the new so the surface bonds properly.
- Faux wood-graining: Want the look of timber without stripping? This paints a grain pattern onto the surface instead.
Consider a parent repainting a hand-me-down bedside table for a nursery. A quick wipe and a test on the underside mean the paint won’t peel the first time a drawer gets yanked open. Test first.
Staying Safe Around Lead Paint
Old paint can hide a serious hazard, so safety comes before you pick up a scraper. Here’s how to protect yourself and the people you live with.
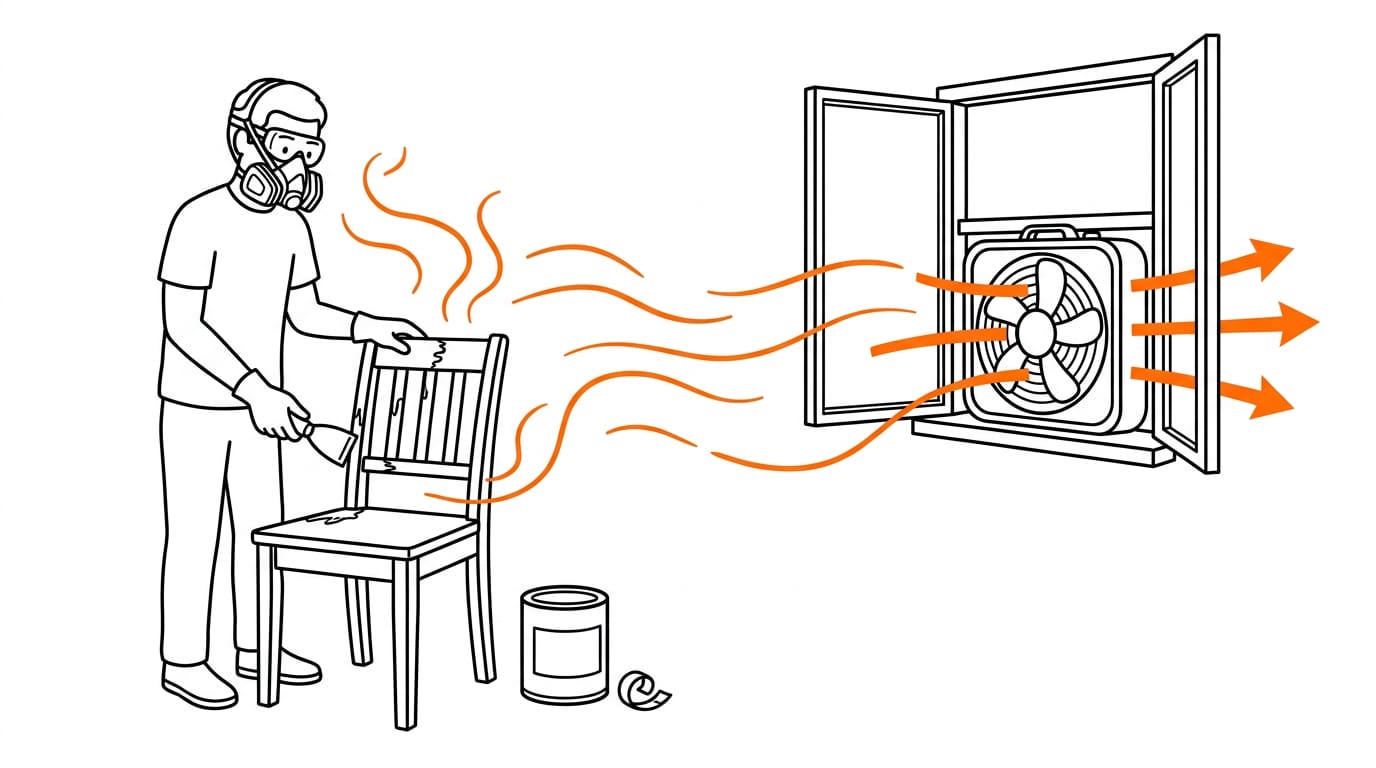
Protective gear and ventilation tips
Start with the basics:
- Gloves. Wear disposable gloves to keep paint off your skin.
- Respirator and goggles. Guard your airways and eyes for the whole job, not just the first few minutes.
- Window fan ventilation. Open windows and set a fan to blow air outward, so fumes move away from you instead of back into the room.
- Low-fume product choice. Pick a low-fume stripper so there’s less to breathe in while you work.
Keeping lead dust under control
Lead dust is the real hazard here, and you can’t always see it. Your aim is to contain it, not chase it around the room. Think of a first-time homeowner scraping an old window frame while the kids play nearby.
They lightly mist the work area so chips stay put, run a high-efficiency particulate air (HEPA) vacuum alongside the scraper, and the room stays clean while the little ones stay out of the dust.
According to the Centers for Disease Control and Prevention (CDC), housing built before the lead-based paint ban in 1978 might be a source of lead exposure. If your home is that age, treat old paint as suspect from the first scrape.
Collect the chips and cleanup materials, then dispose of them as hazardous waste following your local rules. Never toss them in the household bin.
Stripping Paint with Chemical Removers
Chemical strippers can lift a stubborn coat, but the right product and the right order make the difference, so here’s how we’ll work through it. Start by identifying your paint type, since a washable finish and a tougher coat call for different methods.
If a fresh splash is still wet, act before it dries.
Picking a stripper that fits your project
For washable paint, try a cloth with warm water and a drop of Dawn before reaching for anything stronger. For a tougher coat, these are your main options:
- CitriStrip is a low-fume gel, a good pick when you want fewer fumes indoors.
- Thick gel suits vertical surfaces, since it stays put instead of running off.
- Zip Strip is strong, but it’s dangerous if you’re careless, so handle it with care.
- Peel Away may darken the wood, so always test it first.
Think of a tenant with a dried paint drip on a pine skirting board who needs it spotless before the final inspection. A test on a hidden corner shows whether the stripper will darken the wood before the whole board is at risk.
Household fixes are tempting, but treat them as trials, not plans. Does vinegar take paint off wood? It’s a gentle first try, not a guaranteed fix. Can rubbing alcohol remove paint from wood? It’s worth a test on a hidden spot, but don’t count on it.
Does WD-40 strip paint? It isn’t made as a paint stripper, so don’t rely on it.
Applying stripper and scraping it off
Work through these steps in order:
- Apply a generous coat with a rag.
- Wait 30 minutes for it to work.
- Scrape with a plastic scraper, not metal, since metal is what gouges wood.
- Reapply on stubborn spots.
Resist the urge to scrape harder when paint won’t budge, since that’s how wood gets damaged. Patience does the work.
Working through grooves and tight corners
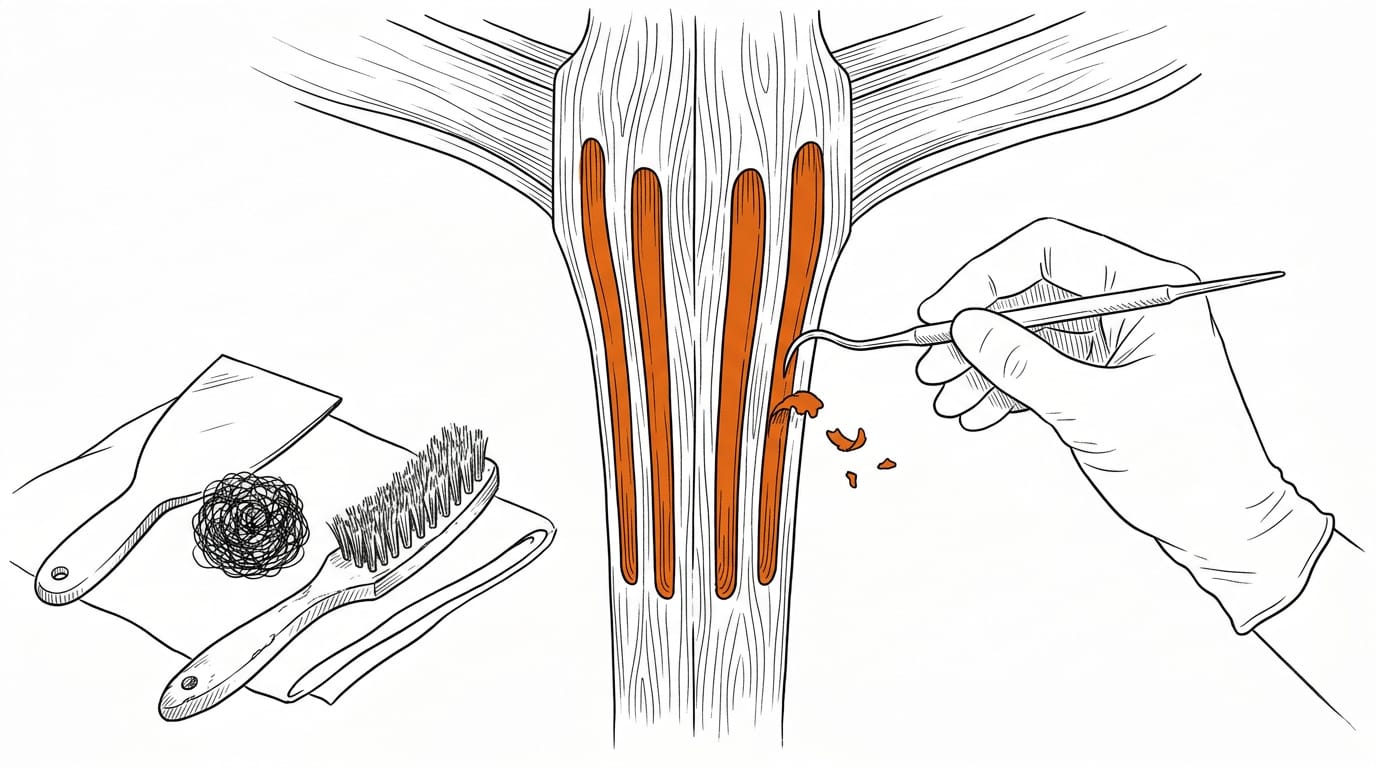
Grooves and tight corners hold on to paint, so switch to finer tools:
- Steel wool for grooves, where a scraper can’t follow the shape.
- Brass bristle brush for detailed areas.
- Dental pick for crevices, moved gently along the edge.
- Avoid gouging the wood: keep your pressure light.
Disposing of sticky stripper residue
Stripper leaves a sticky, gooey residue that spreads fast if you let it. Use a disposable tub to collect scrapings as you go, so the mess stays in one place.
Using Heat to Remove Paint
Heat softens paint so it lets go of the wood, which makes it a fast route through thick coats. Sanding and scraping are the mechanical alternatives, and they skip heat entirely. The heat tools below come with rules worth knowing first.
Using a heat gun and its risks
A heat gun removes most paint layers, so it’s often the first tool people reach for on thick, stubborn coats. Speed brings risk, though.
Old paint and dust collect in wood gaps, and heat can ignite them, so keep the nozzle moving and watch joints and cracks closely.
Lead changes the picture. According to a guide to RRP prohibited work practices, using a heat gun on lead-based paint isn’t compliant with the Environmental Protection Agency’s (EPA) Renovation, Repair and Painting (RRP) Rule.
That rule bars heat guns at or above 1100°F outright on regulated renovations, so check the paint first.
Heat can also reveal original varnish or shellac (a traditional finish) underneath, so you may find a finish worth keeping.
How infrared strippers lift paint
An infrared stripper runs at 400-600°F. Lead vaporizes at 800-900°F, so keeping the surface in the lower band keeps it well below that point.
Think of a parent stripping a secondhand pine bookcase in the garage. They read the smoke as a temperature cue, easing off whenever it thickens, and the paint lifts in strips while the wood stays free of scorch marks.
Your job is to soften the paint, not scorch the wood. Go slow.
Cleaning and Neutralizing Wood After Stripping
Once the paint’s off, the wood still carries a sticky film of stripper and old residue. Clear it away before any new finish goes on, since a fresh coat needs a clean surface to bond to.
The good news is that it’s quick and uses supplies you may already own.
Wiping and rinsing off the residue
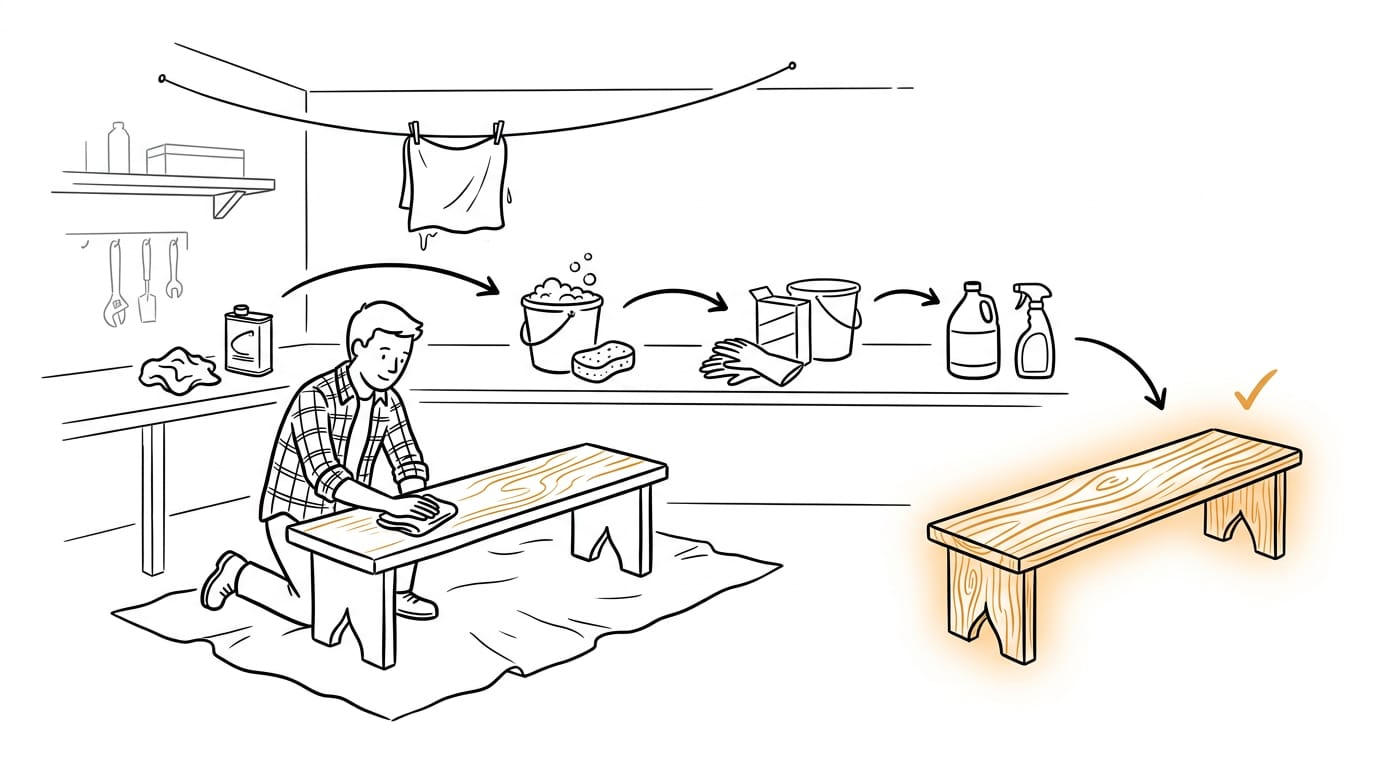
Work through these four steps in order, letting each one dry before you move on:
- Mineral spirits wipe. Dampen a clean rag with mineral spirits and wipe along the grain. Use a light wipe rather than a soak, so the solvent doesn’t sink into the wood.
- Warm water and detergent rinse. Wash the surface with warm water and a drop of mild dish detergent, then rinse with a clean, damp cloth.
- Trisodium phosphate (TSP) wash. For stubborn residue, mix TSP according to the label, wipe it on, and rinse well with clean water. You’ll want gloves for this one.
- Vinegar-water neutralizing rinse. Finish with a cloth dampened in a mix of white vinegar and water to help neutralize any leftover stripper, then let the wood dry fully.
Think of a parent who stripped an old pine bench in the garage. A quick mineral spirits wipe, a warm rinse, and a final vinegar wipe left it free of tacky patches, ready for its new coat. Clean first, paint second.
Prepping the Surface by Sanding
Once the old finish is off, sanding cleans up what’s left and gets the wood ready for new stain or finish. It’s a quick step when you know what to look for.
Sanding the wood once stripping is done
Stripping rarely lifts every last bit of paint, especially from the grooves of a panel door or the corners of a drawer front.
An orbital sander is the easiest way to clear that residue, because its small pad reaches into those spots far more easily than a flat block.
For example, a tenant refinishing a pine chest of drawers left in a rental can clear the stubborn flecks without scraping each one by hand.
Keep your touch light, though. Sand lightly, like dusting a shelf: several gentle passes do more than one heavy push. Pressing hard wears through the wood fast and can leave uneven spots that show up under new finish. Go easy.
Water is worth watching for. If you wiped the wood down after stripping, the grain may have risen and feel rough. Let it dry fully, then give it a light sanding so the surface feels smooth again before you apply anything.
Be careful with how much you sand. Heavy sanding removes the patina, the soft colour and wear an older piece builds up over the years, and you can’t get it back once it’s gone.
Aim for clean rather than bare, and you’ll keep the character that made the piece worth saving.
Finishing Bare Wood After Paint Comes Off
Once the old paint is off, bare wood needs a few careful steps. Here’s the order to follow.
Staining in coats after testing scraps
Stain goes on best in multiple coats, not one heavy one. Thin layers let you watch the color build. A renter refinishing a stripped cabinet door, for example, might add one light coat, then a second only if the wood still looks pale.
Before you touch the piece, run test spots on a scrap of the same wood, since one stain can look different from board to board.
For an aged look, blend stains rather than relying on one can. Mixing two shades helps you warm up or deepen the tone.
Sealing the wood with a topcoat
A topcoat locks in the color. Sealing is about protecting the color, not changing it. Pick the option that suits the job:
- Polycrylic: Apply three coats for a clear, durable finish.
- Oil-based sanding sealer: Use it as a first layer before your topcoat.
- Waterborne polyurethane: A clear, durable topcoat option.
- Paste wax and steel wool: Rub on paste wax with fine steel wool for a soft, hand-rubbed sheen.
A parent refinishing a child’s chair, for instance, wants a finish they can wipe down without worry.
Fixing paint missed in the grooves
Carved details often hold flecks of old paint. White paint left in grooves stands out against stain, so it’s worth fixing. Mix brown acrylics until the shade matches your stain, then work it into the grooves with an artist brush or a toothpick.
A host refinishing a dining table can blend those lines in before guests arrive. Small touch-up, big payoff.
Removing paint from wood is less about brute force and more about working in the right order.
Decide whether the piece is worth the effort, keep yourself safe around any lead, strip or heat the old finish, clean and neutralize, sand smooth, and finish with care. Each step sets up the next, so rushing one usually means redoing it.
Take it one layer at a time, and the bare wood will be worth the wait.
References
- Know the Facts | Childhood Lead Poisoning Prevention — cdc.gov (2025)
- RRP Prohibited Work Practices: The Methods You Cannot Use — leadsafefiling.com (2026)
- How To Refurbish An Antique Without Ruining Its Value — countryliving.com (2025)
Questions
Will Dawn dish soap remove paint?
Dawn may remove fresh, washable paint from wood when used with warm water and a cloth. For dried or tougher paint, it is unlikely to work as a reliable remover.
Does vinegar take paint off wood?
Vinegar is a gentle first try for paint on wood, but it is not a guaranteed paint remover. Test it in a hidden spot first, since results can vary.
Can rubbing alcohol remove paint from wood?
Rubbing alcohol may soften some finishes, but it is not a dependable way to remove paint from wood. Test a small hidden area first, as alcohol can affect the finish or color.
Does WD-40 remove old paint?
WD-40 is not designed to strip paint, so it is not a reliable way to remove old paint. Use a suitable paint remover or another method intended for the finish, and test it on a hidden spot.
Does WD-40 strip paint?
No. WD-40 is not made as a paint stripper, so don't rely on it to remove paint from wood.
Can I paint over already painted wood furniture?
Yes, you can often paint over painted wood furniture if the existing paint is sound. Clean and prepare the surface first, and check for wax or a shellac finish, which may need special treatment for the new paint to bond.
Can vinegar be used to remove paint from wood?
Vinegar is a gentle first try for removing paint from wood, but it may not work, especially on a tough or dried coating. Test it on a hidden spot; vinegar diluted with water is also sometimes used after stripping to help neutralize residue.
Will a pressure washer remove paint?
A pressure washer can remove loose or peeling paint, but its force and water can damage wood, drive moisture into it, or leave the surface rough. It is generally safer to use a suitable paint stripper or careful scraping and sanding, especially on furniture or delicate wood.
Sources
- RRP Prohibited Work Practices: The Methods You Cannot Use, leadsafefiling.com,
- Know the Facts | Childhood Lead Poisoning Prevention | CDC, cdc.gov,
- How To Refurbish An Antique Without Ruining Its Value, countryliving.com,
Read next
- Remove Water Stains from Wood, Gentlest Fixes FirstRemove water stains from wood by first telling white rings from black marks and finish-level stains from damage in the wood, then choosing the right fix.
- Wood Heater Cleaning: Ash, Glass, Flue and Safety BasicsWood heater cleaning gets easier with better burning habits, safe ash removal, glass cleaning, plus simple checks for creosote and worn stove parts.
- Rubbing Alcohol for Pen Stains: The Complete GuideRubbing alcohol for pen stains can lift ink from clothes, hands, notebooks, and wood. Get steps for carpets, sofas, and hard floors, too, with care.
Stain Finder: a free stain removal guide
Find your stain