How Does an Ultrasonic Cleaner Work? A Complete Guide
How does an ultrasonic cleaner work? See how tiny bubbles loosen grime, which solutions and settings suit different jobs, and where cleaning falls short.

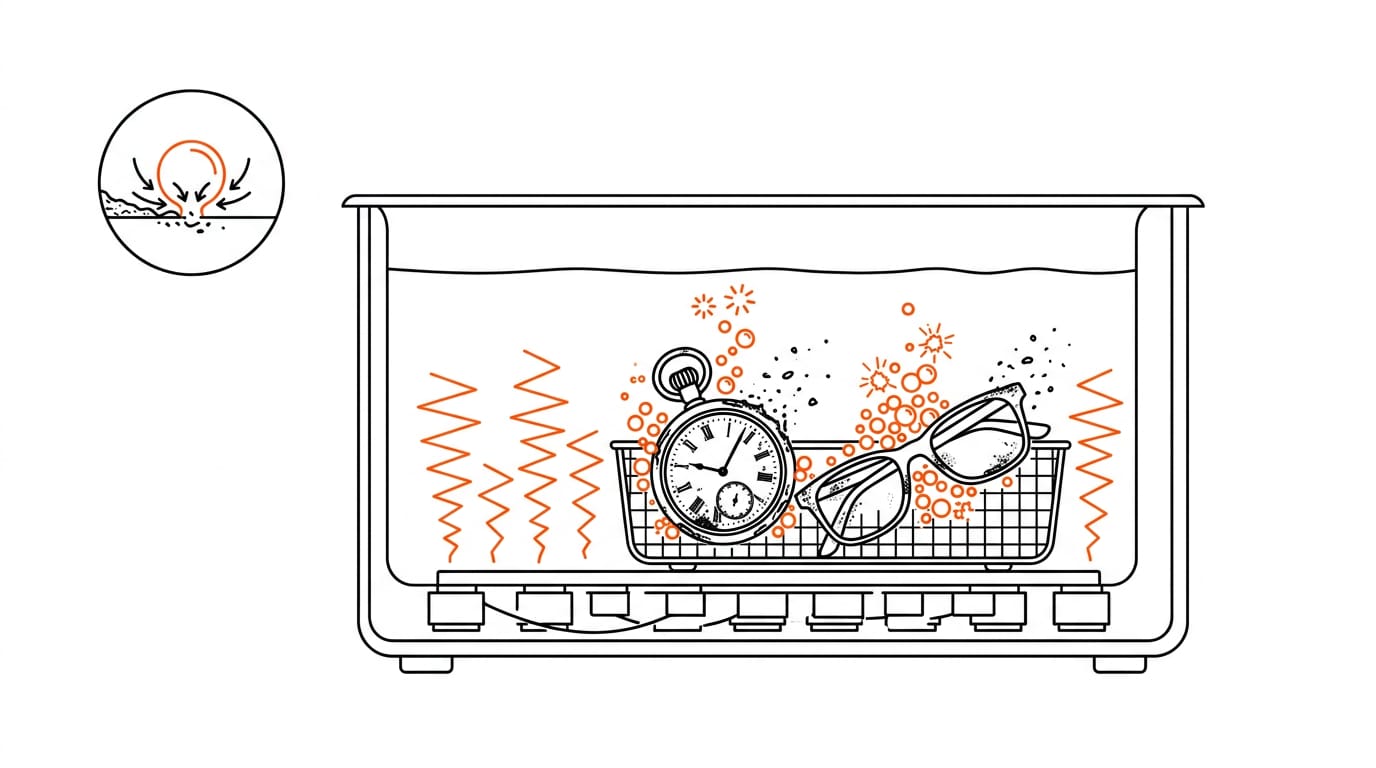
An ultrasonic cleaner uses high-frequency sound waves in liquid to create tiny bubbles that collapse and loosen dirt from objects. The bubbles reach crevices and small openings, while the right solution, temperature, frequency, power, and cycle time help balance cleaning strength with material safety. It is useful for detailed, compatible items that are hard to scrub, but it cannot clean every material or stubborn residue, and it is not a tool for carpets, upholstery, or fresh stains.
Think about how a dishwasher reaches the grime a sponge never could. An ultrasonic cleaner works on a similar idea, but it uses sound instead of jets of water.
High-frequency waves moving through the liquid create countless tiny bubbles that form and collapse against the surface of whatever you’ve placed inside.
In this post, we’ll explain how that process works, what each part of the machine does, and which settings and solutions suit different jobs. We’ll also cover what it can’t do, and where it fits beside your everyday stain remover.
How an Ultrasonic Cleaner Works Using Cavitation
Ultrasonic cleaners rely on cavitation to lift dirt from objects you can’t easily reach by hand.
How cavitation removes dirt from surfaces
Ultrasonic cleaners send ultrasound, which is high-frequency sound pitched above human hearing, through the liquid. The process runs in five steps:
- Sound waves pass through the liquid.
- Tiny bubbles form, then implode.
- Each collapse sends out shock waves that dislodge dirt.
- Those waves reach crevices and blind holes.
- The moving liquid carries the loosened debris away.
Consider a home cook with a set of greasy oven shelves. The bubbles reach the gaps a sponge struggles with, so you’re not scrubbing each one by hand.
Two kinds of cavitation that work together
Cavitation comes in two forms. Inertial (transient) cavitation sees bubbles grow and collapse violently, while stable (non-inertial) cavitation has them pulse in place. It’s less about one type doing everything and more about both types working together.
Both occur simultaneously in the same tank.
What bubble implosions release into the liquid
When a bubble implodes, it releases energy into the liquid in four ways:
- Localised heat and shock waves. The energy stays concentrated at the collapsing bubble.
- Extreme temperature and pressure. According to a minireview on cavitation bubble temperature and sonoluminescence, imploding bubbles in an ultrasonic cleaner produce extreme localised temperatures and pressures.
- Microscopic high-speed jets. A collapsing bubble can send a tiny, fast stream of liquid toward the surface.
- Compression and rarefaction cycles. The sound wave squeezes the liquid, then pulls it apart, over and over.
The bubble is just the trigger. The collapse is where the work happens.
The Parts Inside an Ultrasonic Cleaner
An ultrasonic cleaner is simpler than it looks: a few key parts work together to turn wall-socket power into scrubbing action in the tank. Knowing what each one does helps you choose well and get better results.
Transducers turn electricity into vibration
The transducer does the real work. It converts electrical energy into high-frequency vibration, and that vibration travels through the solution to loosen dirt. The two types you’ll see are:
- Piezoelectric transducers use a ceramic that changes shape when an electric charge is applied.
- Magnetostrictive transducers use a metal that changes shape in a magnetic field.
Each type involves a tradeoff between efficiency (how much power becomes useful vibration) and durability (how long the part lasts), so build quality matters as much as type.
Bonded transducers are fixed to the tank, while immersible transducers sit in the solution inside their own housing.
What the generator does with mains power
The generator takes ordinary mains power and converts it to high frequency, then feeds that output to the transducers. A sweep frequency shifts the frequency across a range rather than holding it still, which helps spread vibration more evenly.
Feedback control monitors the transducers and adjusts the output to keep them working steadily.
Programmable timers and power settings let you choose how long and how hard a cycle runs. A delicate item and a greasy set of parts don’t need the same treatment.
The stainless steel tank and its size
The tank is usually stainless steel, and it holds both the solution and your items. Size should match your workload: a large tank is wasted on a pair of spectacles, while a small one won’t fit a full set of parts.
The inside finish matters too, since a smooth surface is easier to wipe clean, and some tanks come with coatings.
Keeping parts off the floor with baskets
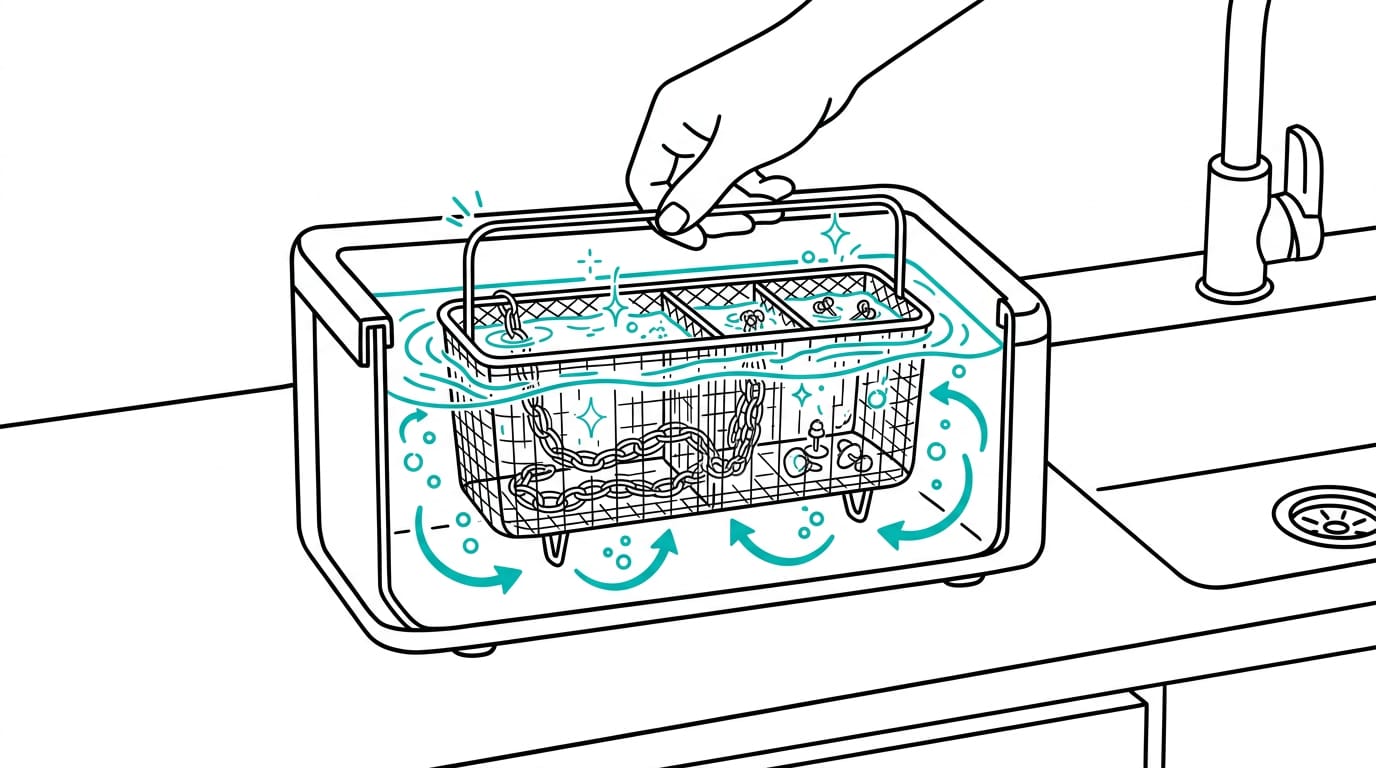
A basket lifts your items off the tank floor. It’s less about holding things and more about positioning them so solution can circulate around every surface.
Consider someone cleaning a few silver chains and earrings at the kitchen sink. Left on the base, they could tangle, knock against the metal, or sit in one spot. In a basket, each piece stays separate and protected, so they’re far less likely to scratch.
Mesh size matters too: it should be fine enough to stop small pieces slipping through, and the basket’s capacity sets how much fits in one go. Small detail, big difference.
Why heating the bath speeds grease removal
Some units can heat the solution, and warmth helps with grease. Warm liquid loosens greasy residue more readily than cold, which speeds up the job.
A thermostat holds the bath at a steady temperature, and programmable thermostat control lets you set it for each task. Heating is optional on some units, so if greasy parts are your main job, check the spec before you buy.
Why Ultrasonic Cleaning Beats Traditional Methods
Hand scrubbing struggles with fiddly items. Here’s where an ultrasonic cleaner pulls ahead of hand or steam cleaning:
Reaching complex geometries
Many items have complex geometries, meaning tight corners, hollows, and tiny openings.
A systematic review of decontamination methods for laparoscopic equipment notes the mechanism is “particularly effective for accessing areas that are difficult to reach by manual brushing.”
A paper on parameters in ultrasonic cleaning for implants says it’s widely accepted as an invaluable tool where blind holes (holes closed at one end) are present.
Consider a parent cleaning a grandmother’s necklace before a wedding. A toothbrush can’t reach the clasp, but a short soak in the tank can, and it comes out clean.
Faster, more consistent results
Because the bubbles do the scrubbing, you spend less time working a brush into every groove. Each cycle treats every item the same way, so the result depends on the settings, not on how hard your wrist is working that day. Less effort, same result.
Gentler on items and chemicals
The cleaning comes from bubbles rather than bristles or grit, which makes the process non-abrasive. One tank suits jewellery and small tools alike.
A technical report on replacing a chlorofluorocarbon (CFC) system examined how ultrasonic cleaning could reduce the hazardous materials tied to conventional CFC use.
What it costs over time
A German buyer’s guide from CHIP says costs can vary widely with size, power, brand, and extra features. So how much does an ultrasonic cleaner cost? It depends on the model, so match the size and features to your jobs.
Over time, the value builds: fewer harsh products to replace, and one machine that handles many jobs.
What Changes How Well It Cleans
Several settings and habits decide how hard the bubbles work and how safely they treat your parts.
Choosing frequency for gentle or heavy cleaning
Frequency sets the size of the cavitation bubbles. Lower frequency gives larger, aggressive bubbles for heavy grime on sturdy parts, while higher frequency gives smaller, gentler bubbles for fine detail.
Think of someone cleaning reading glasses at the kitchen table: the lenses and frame finish are delicate, so a higher setting lets them come clean without wearing down the finish.
For very delicate items, megasonic cleaning goes further, using an even higher frequency.
Power level sets cavitation strength
Power controls how forcefully the bubbles collapse. More power means stronger cavitation and faster work on tough grime, but too much damages delicate items, so enough power beats maximum power.
A larger tank spreads the same power across more liquid, which lowers the power density, or power per gallon. Adjustable or pulse settings let you dial power down or switch to on-and-off bursts that give fragile parts a break. Less is often more.
Why warm liquid cleans better
Warm liquid improves cleaning, partly because it softens grease and other soils so they release more easily. Picture a home cook soaking greasy stove knobs in warm cleaning solution: the grease softens, so the cleaner has far less to lift.
The question isn’t whether to warm the liquid but how warm, since the best range varies with the liquid and the job. Heat can also damage sensitive materials, so keep it moderate for delicate parts.
Timing cycles and spacing out loads
Cycle duration affects cleanliness, but running too long can damage parts, so longer isn’t always better. Two habits help the bubbles do their job:
- Avoid overloading. Packing the basket blocks bubbles from reaching every surface.
- Space items apart. Give each piece room so none shields another.
Why dissolved gas weakens bubble implosions
Liquids hold dissolved gas, and it gets in the way. Gas pockets cushion each bubble as it collapses, weakening the implosion. What matters is the collapse, not just the bubble.
To clear it, degas the liquid by running the cleaner empty before you load anything. Some machines have a built-in degas mode that does this for you.
The liquid’s own traits that matter
The liquid itself shapes how the bubbles behave. Four properties matter most:
- Vapor pressure. Liquids with higher vapor pressure release more vapor into the bubbles, which cushions their collapse.
- Surface tension and surfactants. Surface tension resists spreading into tight spots. Surfactants, the detergent ingredients in many cleaning solutions, lower it so the liquid reaches into crevices.
- Viscosity. Thicker liquids resist movement and can dampen the action, so thinner liquids let bubbles move more freely.
- Liquid density. Density changes how sound travels through the liquid, so switching liquids can change results even with the same settings.
What to Put in the Tank
The liquid you pour in matters as much as the machine, so it’s worth choosing with care.
Plain water or added detergent
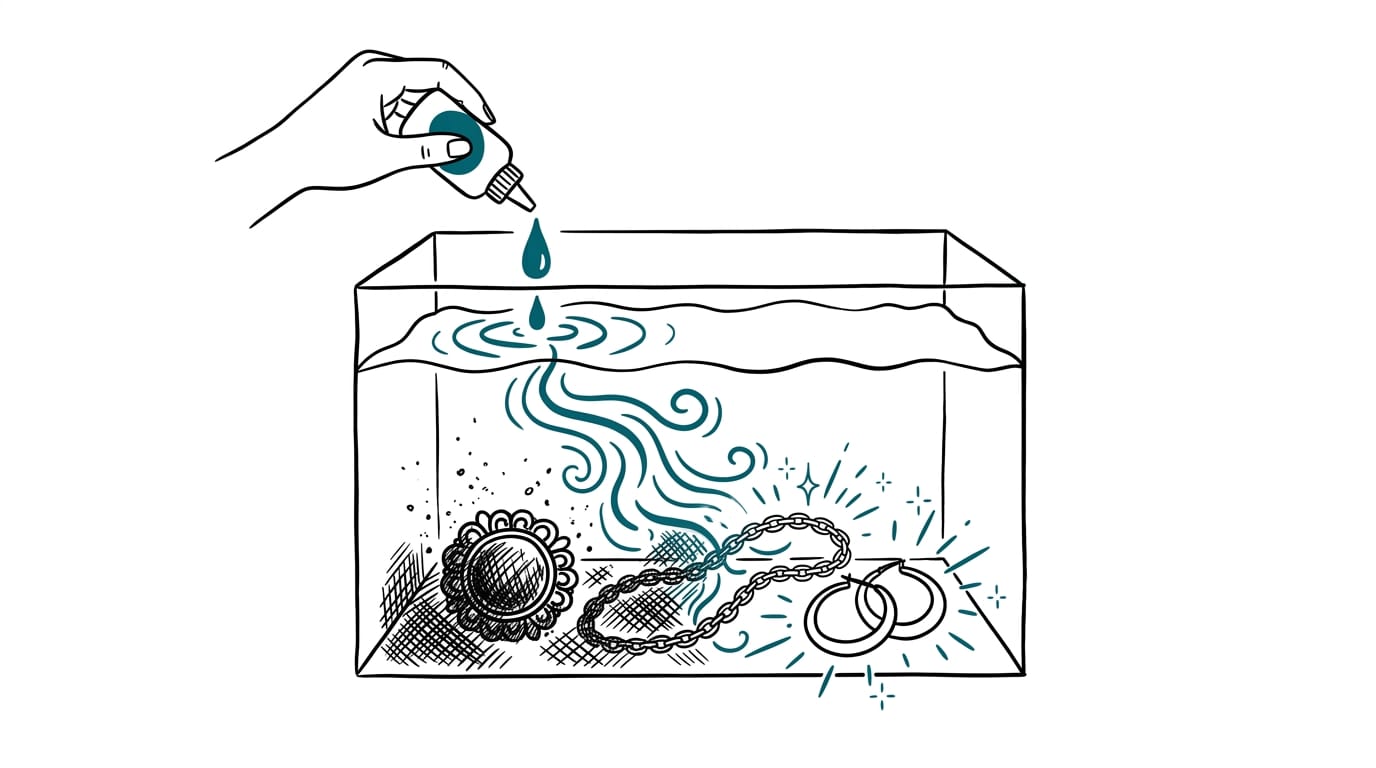
Water alone can work for light dirt. Detergent improves results because it helps lift grime that water can’t shift on its own. When you want to avoid tap-water residue, use deionized water, which has had its dissolved minerals removed.
A solution isn’t strictly required. Start simple. For home use, washing-up liquid is the easiest upgrade. Think of a tenant with tarnished costume jewellery before a dinner party: a few drops in the tank, and the pieces come out ready to wear. When washing-up liquid isn’t enough, isopropyl alcohol for cleaning is the next thing to understand.
Plain water is a starting point, not a finish line.
Which chemistry suits which contaminant
Matching the chemistry to the mess matters most, and the key is pH, a scale that shows how acidic or alkaline a liquid is:
- Alkaline detergents for grease.
- Acidic solutions for rust and scale.
- Enzymatic cleaners for protein residues, which enzymes help break down.
- Neutral pH solutions for delicate items that harsher chemistry could damage.
- High caustic solutions for heavy oils. Caustic means strongly alkaline, so these are best left to workshop users who know how to handle them safely.
Picking the right solution for the job
- Match material and contaminant. Pick a solution that suits both the item and the dirt.
- Check compatibility. Make sure it’s safe for the metal, plastic, or coating you’re cleaning.
- Weigh environmental and budget factors. Think about cost per use and how you’ll dispose of leftovers.
- Test on a small area. Try a hidden spot first, like the underside of a clasp.
- Follow manufacturer and Material Safety Data Sheet (MSDS) guidance. The MSDS lists a product’s hazards and how to handle it safely.
The Cleaning Cycle and Machine Setups
Every ultrasonic cleaner runs the same basic cycle. Here’s what each stage does, and how the machines differ.
What happens during a typical cycle
Most cycles follow four steps:
- Place items in a basket so they don’t rest on the tank floor, then fill the tank with water and cleaning solution to the marked line.
- Start the cycle and the transducers turn electricity into high-frequency sound waves.
- Those waves create tiny bubbles, a process called cavitation, which grow and implode against your items, lifting grime from every crevice.
- Lift the items out, rinse them in clean water, and let them air dry.
Cavitation is less about scrubbing and more about reach. Picture a grandparent cleaning a box of tarnished costume jewellery: the bubbles slip into chain links a toothbrush can barely reach, so the necklaces come out clean. No toothbrush required.
Machine setups from single tanks to gantries
- Single-tank units. One tank does the wash, so you rinse items separately afterward.
- Multi-tank systems. Items move through separate wash and rinse tanks, keeping the rinse water clean.
- Immersible transducers. These sit in the liquid, bolted to the tank’s base or side.
- Rod transducers. Slim, sealed bars fitted through the tank wall, suited to larger or custom tanks.
- Automated gantry systems. An overhead frame moves baskets through a line of tanks, mostly in factories.
Extra features that refine cleaning
- Sweep frequency. The frequency varies across a range, so the waves don’t settle into weak spots.
- Pulse modulation. Power switches on and off in short bursts instead of running steadily.
- Variable frequency modes. Some machines offer preset modes, letting you match the cycle to the items you’re cleaning.
- Automatic degassing and diagnostics. Degassing removes dissolved air that cushions the bubbles, and diagnostics check the system and flag faults.
Where Ultrasonic Cleaners Are Used
You’ll find ultrasonic cleaners in places that look nothing alike, from dental surgeries to aircraft hangars. The bubbles work the same way in each, but the real question is less about strength and more about what you’re cleaning.
Cleaning in medical, dental and lab settings
Clinics and labs use them for spots hands can’t reach.
- Surgical and dental instruments: Hinges, serrations and grooves get cleaned where blood and debris hide.
- Laboratory glassware: Flasks and pipettes come out clean without a brush scratching the inside.
- Pre-sterilization stage: Cleaning comes first, since leftover debris can stop sterilization from working.
- Biofilm removal: A biofilm is a slimy layer of bacteria clinging to surfaces, and the bubbles help loosen it.
Industrial parts from cars to aircraft
Factories use the same method on heavy, greasy and intricate parts.
- Automotive carburetors and injectors: Fuel passages get cleared without pulling the whole part apart.
- Aerospace turbine parts: Blades and housings with complex shapes get a thorough clean.
- Bearings, gears and molds: Grease and residue come out of tight gaps and detailed surfaces.
- Marine, printing, food and textile: Ship parts and machinery in these trades get the same treatment.
Delicate work on circuits, lenses and jewelry
Here the work calls for a lighter touch.
- Printed circuit boards (PCBs) and semiconductors: Fine residue comes off them cleanly.
- Lenses and optical parts: Dust and smears lift off without the rubbing that can scratch coatings.
- Jewelry and watches: Engraved details and tight settings get reached where a brush can’t.
- Art and antique restoration: Used on some pieces with care, since not every finish handles the vibration well.
Think of a home cleaner with a grimy ring and a pair of reading glasses. Drop them into a small tank with the right solution, and the bubbles reach hinges and settings a cloth can’t. No scrubbing required.
Where Ultrasonic Cleaning Falls Short
Ultrasonic cleaning is brilliant on the right items, but it has clear limits. It’s less about what it can clean and more about what it can’t.
Carpets, rugs, and upholstery stains are firmly outside its reach, so those call for a proper stain removal method instead. Enzyme cleaners are one stain removal method worth understanding before you choose.
Stubborn residues that resist ultrasonic cleaning
Some build-ups simply won’t budge, however long the cycle runs:
- Strong adhesives, resins, and paints
- Some biological materials, which may not lift however long you run it
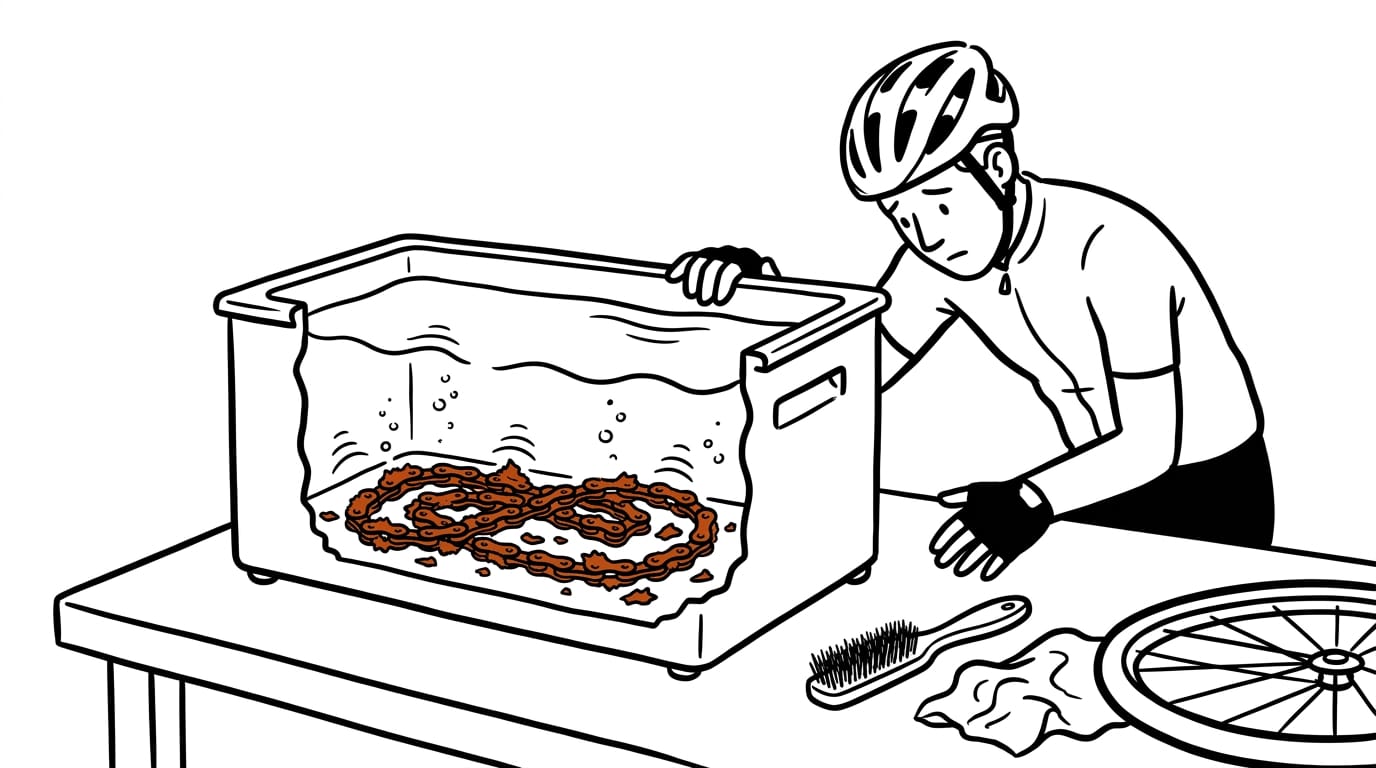
- Rust and scale, the hard mineral crust that builds up in kettles
- Baked-on carbon deposits
Think of a cyclist who drops a rusty chain in the tank and expects the flakes to vanish. They won’t, so you’re back to scrubbing by hand.
Items that don’t belong in the tank
Some materials simply don’t belong in the tank:
- Soft gemstones, such as pearls and opals
- Porous wood and leather
- Glued components, anything held together with adhesive
- Some plastics, where the care label is your best guide
Say you’ve inherited a string of pearls from your gran. Those get a gentle hand wipe instead of a trip into the tank.
Myths about homemade ultrasonic cleaners
Videos claim a speaker and a tin can make a working cleaner. They won’t, so skip the experiment. Think of a student who builds one after a late-night video and ends up with a wet worktop and a pan still caked in carbon.
Another myth is that any liquid will do. It won’t, so stick to the solution the manufacturer recommends.
And it doesn’t clean everything. The residues above need a different method.
Staying Safe and Keeping It in Shape
An ultrasonic cleaner mixes water, electricity, and sometimes chemicals, so a few habits keep you and the machine safe. Here’s what to check before you switch on, and how to look after it afterwards.
Protecting yourself while you clean
Get these basics in place first:
- Protective gear. Wear gloves for solutions, goggles against splashes, and hearing protection if the unit is loud.
- Electrical grounding. Plug into a grounded (earthed) outlet and keep the cord dry, away from the sink.
- Ventilation. Some solutions give off fumes, so run the cleaner where fresh air can get in.
- Safe chemical handling. Read the label, measure carefully, and never mix products.
- Never run it dry. Keep fluid at the fill line, since running without it can damage the unit.
- Skip flammable liquids. Petrol, paint thinner, and similar liquids have no place in the tank.
Consider a home cleaner who runs a tray of grimy cutlery in the laundry room with the window open and the unit on a dry shelf, away from the sink. Fumes stay low, nobody gets a shock, and the cutlery comes out gleaming.
Everyday care and best practices
Replace the solution regularly, because fresh solution cleans while tired solution mostly moves grime around. Next, pre-clean heavy debris by rinsing off dried food or caked-on grease, so the solution isn’t wasted on it.
Use a basket or rack to keep items clear of the tank floor and each other, fully submerged rather than piled up. Once they’re out, rinse and dry them fully, then empty and dry the tank too.
Check the tank and the transducers (the parts that produce the vibrations) every so often and wipe away any film with a soft cloth. Small habits, steady results.
The History and Future of the Technology
Ultrasonic cleaning is older than the countertop unit you might be eyeing. Here’s how it got from factory floor to kitchen, and where it’s heading next.
From 1950s factories to affordable home units
Industrial ultrasonic cleaning was already in use by the 1950s. A paper titled Metal Cleaning and Its Improvement by the Use of Ultrasonics describes conveyorized equipment, in use in industrial plants, that produced as many as 8,000 parts per hour.
Compact, affordable units now bring the same principle to the kitchen. For example, a parent cleaning a tray of grimy bike chain links can clean them on the counter in one go, skipping an afternoon of hand scrubbing.
The big change is where it lives: once on the factory floor, now on your counter.
Where the technology is heading next
The next step is less about more power and more about smarter control. Several trends are shaping what comes next:
- Automation and robotics. Robotic arms could load and unload parts, so fewer people need to tend each cycle.
- Internet of Things (IoT) and remote monitoring. Connected units could send status updates to your phone, so you’ll know when the cleaning solution needs changing.
- Eco-friendly solutions and water reuse. Gentler fluids and filtered water that can be used again could cut waste.
- Better transducers and frequency control. Transducers turn electricity into vibrations. Finer control over frequency (how fast those vibrations repeat) could tune cleaning for delicate or stubborn grime.
- Integrated systems. Washing, rinsing, drying, and filtering could all happen in one unit.
Expect smarter machines, not just bigger ones.
An ultrasonic cleaner is a clever tool, but it’s a specialist one. Used on small, detailed items with the right solution, it reaches places a brush never will.
Used on a fresh spill, it’s the wrong tool entirely, and that’s where your stain remover earns its place. Understand what it does well and where it falls short, and it becomes a dependable helper rather than a gadget gathering dust.
Match the machine to the mess, and it’ll earn its spot on your shelf.
References
- Comparative efficacy of decontamination methods for laparoscopic equipment: a systematic review and meta-analysis — pmc.ncbi.nlm.nih.gov (2025)
- A correlation between cavitation bubble temperature, sonoluminescence and interfacial chemistry — pmc.ncbi.nlm.nih.gov (2022)
- Metal Cleaning and Its Improvement by the Use of Ultrasonics — doi.org
- Parameters in Ultrasonic Cleaning for Implants and Other Critical Devices — doi.org (2006)
- Ultrasonic cleaning as a replacement for a chlorofluorocarbon-based system. Technical report (Technical Report) — osti.gov (1993)
- Ultraschallreiniger kaufen: So holen Sie sich die Profi-Reinigung nach Hause — chip.de (2026)
Questions
What is the principle of ultrasonic?
Ultrasonic cleaning uses high-frequency sound waves sent through liquid to create tiny bubbles. These bubbles form and collapse in a process called cavitation, producing shock waves and tiny jets that loosen dirt, including in crevices and hard-to-reach areas.
How much does an ultrasonic cleaning cost?
The cost depends on the cleaner’s size, power, brand, and features. Small home units generally cost less than larger or industrial models, so choose a tank and feature set suited to your cleaning jobs.
Do you need water in an ultrasonic cleaner?
Yes. The tank needs liquid, usually water or water mixed with a suitable cleaning solution, for the sound waves to create cavitation. Never run an ultrasonic cleaner dry, as this can damage the unit.
What not to clean with ultrasonic cleaner?
Avoid cleaning soft gemstones such as pearls and opals, porous wood or leather, glued items, and plastics unless their care guidance confirms they are safe. Ultrasonic cleaners are also ineffective on carpets, rugs, upholstery, and some stubborn residues such as strong adhesives, paint, baked-on carbon, rust, and scale.
Sources
- A correlation between cavitation bubble temperature, sonoluminescence and interfacial chemistry – A minireview, pmc.ncbi.nlm.nih.gov,
- Metal Cleaning and Its Improvement by the Use of Ultrasonics, doi.org
- Ultraschallreiniger kaufen: So holen Sie sich die Profi-Reinigung nach Hause - CHIP, chip.de,
- Comparative efficacy of decontamination methods for laparoscopic equipment: a systematic review and meta-analysis, pmc.ncbi.nlm.nih.gov,
- Parameters in Ultrasonic Cleaning for Implants and Other Critical Devices, doi.org,
- Ultrasonic cleaning as a replacement for a chlorofluorocarbon-based system. Technical report (Technical Report) | OSTI.GOV, osti.gov,
More in Floors & Carpets
- Is it worth buying a carpet cleaner, or hiring one?What hiring a carpet washer, buying one or paying a professional costs in pounds, which carpets to keep machines off, and how to avoid over-wetting.

- Citric Acid for Cleaning: A Complete GuideCitric acid for cleaning loosens kettle limescale and cloudy shower deposits. Find the right mix, surfaces to avoid, and how it compares with vinegar.
- How to Remove Paint from Wood Safely, Step by StepHow to remove paint from wood safely: check for lead, choose a stripper or heat, then neutralize residue, sand smooth, and protect the bare wood.
Stain Finder: a free stain removal guide
Find your stain